Audio-video performance is a vital aspect of every webinar or an online meeting. To make sure your event’s attendees can see and hear you perfectly, you need to run a webcam test and check your microphone. How to take care of it? Here are two simple ways.
First off, what are the foundations of a successful video conference? Whether you are a host of a large webinar where you expect hundreds of attendees, or you organize daily online meet-ups with your distributed team, you must be well prepared:
-
Your professional knowledge and experience are a class by itself;
-
Presentation and other resources you want to share are flawless;
-
You know how to engage your audience.
But the last element of that checklist is the one that will allow you to say: “mission complete,” as soon as your event is over.
And that is the audio-video quality of your virtual conference.
Table of Contents
How to test your webcam and microphone?
Here, at ClickMeeting, we are fully aware that as soon as you click the “start” button, you need to feel the confidence that your devices are working correctly.
That’s why we have created two features to empower you to double-check if everything is fine – also with your web camera and a mic.
1. Check your system configuration
Naturally, to organize virtual conferences, you need to get your hands on a webinar software in the first place. If you already have an account on the ClickMeeting webinar platform, logging in will be your first step. If you’re new to the subject, sign up for a free trial.
Next, you need to schedule your event. From the main dashboard, you can:
-
Create a meeting. Are you planning to organize online events for smaller groups of attendees? This option is a perfect match for daily team meetups, board meetings, or web conferences with business partners, students, potential investors, or customers.
-
Create a webinar. If your business goal is to connect with a broader audience and share your valuable insights for the sake of educational, marketing, or sales purposes, then webinars are a way to go.
In this article, we’re not going to focus on describing the process of creating a meeting or a webinar. To make it as convenient for you as possible, we have published a detailed guide linked below:
Read the complete guide to create webinars
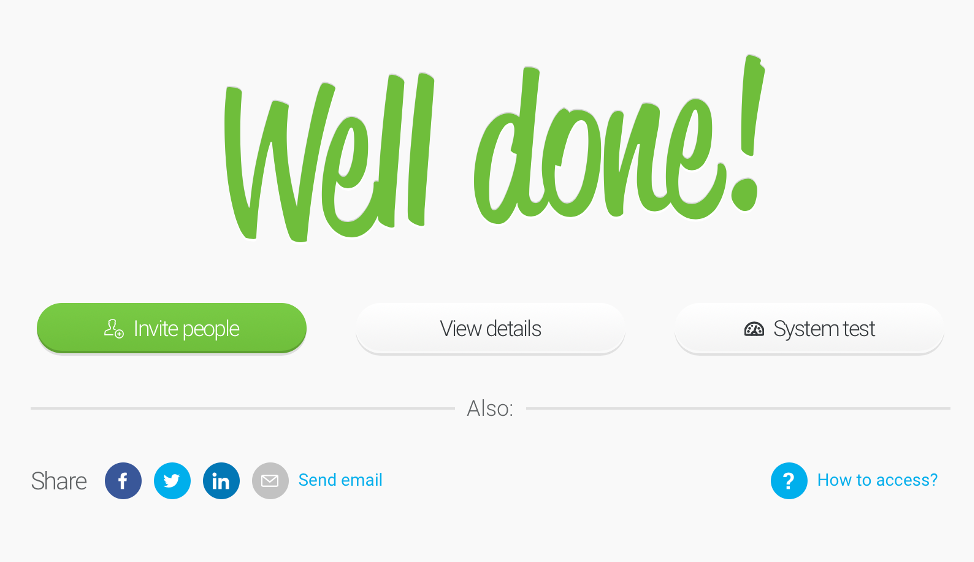
Once you created your event, you will come across our first tool to look after your audio and video. To make that happen, click the “System test” button on the “Well done” page:
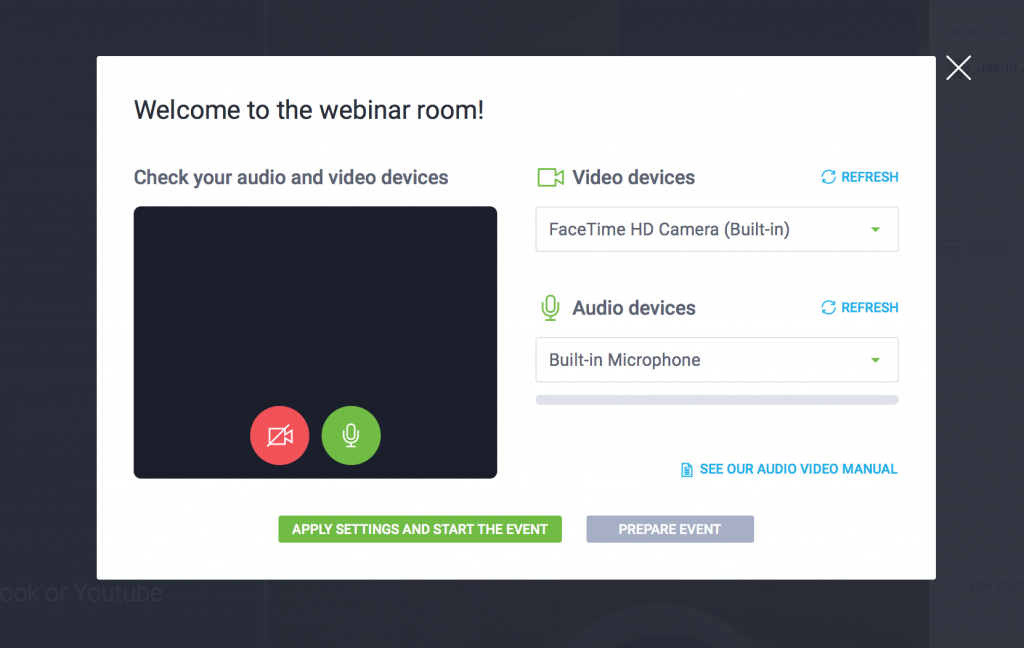
You will land on the page dedicated to checking your system configuration and devices:

On the left side, you can find the elements fundamental to run your event smoothly:
- Conference server connection;
- Operating system;
- Web browser.
The system check will detect all those automatically and let you know if everything works correctly, and you’re ready to go with your online conference.
If everything is fine, it’s time to take a look at the right side of the page. Here, you can:
- Test your audio output;
- Do some quick microphone testing;
- Check if your webcam is working.
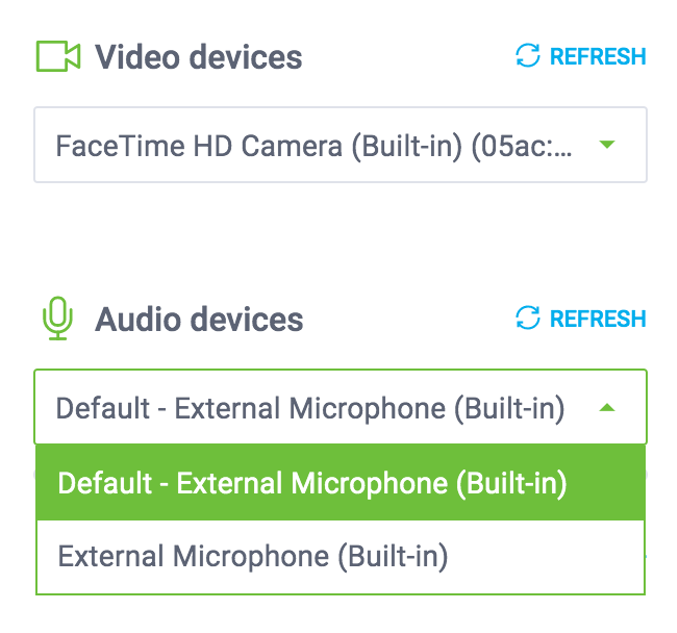
Again, the system should recognize your devices, like a built-in mic or a webcam. If you plug in any external microphone or cameras, click “Refresh” and see how it works.
PRO Tip:
Read our article: Complicated System vs Webcam – How to Set Up Your Video Conferencing Solution? and choose the best webcam or a video conferencing system for your business.
Bear in mind you can come back to that system check page at any time. To do that, go back to your dashboard and find your upcoming event on the list. Next, click on the Details:

Then, on the Event details page, click the “System configuration test” at the bottom:

2. Final checkup – the Audio-Video Tester
OK, it’s the final countdown before the launch of your virtual conference. Even though, you went through the tool described above, it’s worth double-checking whether your microphone is working and to run a final online webcam test.
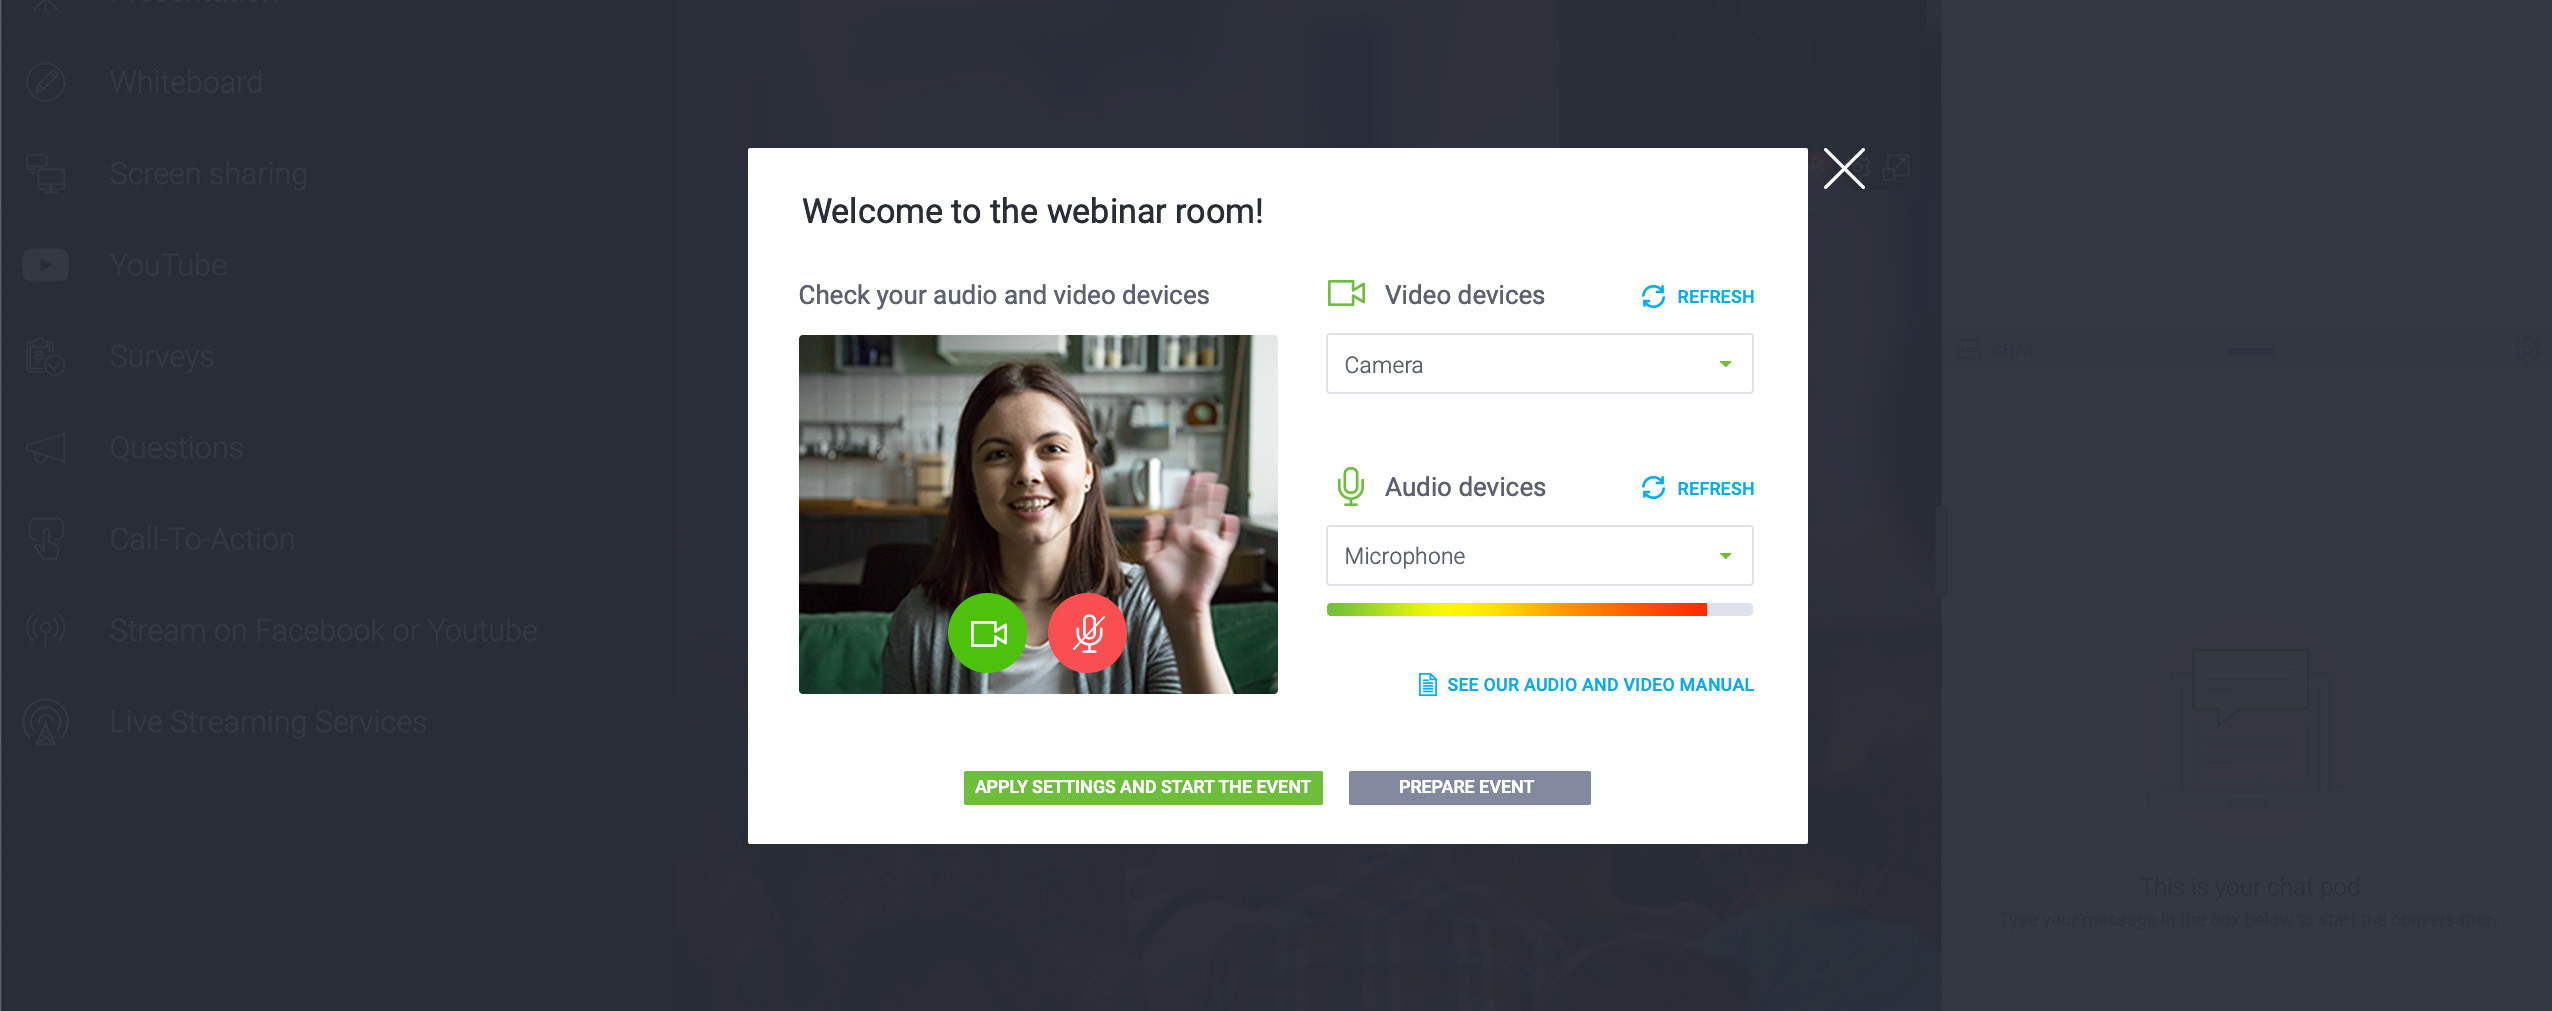
Once you enter the webinar room, you will immediately see the Audio-Video Tester pop-up window:
It means that right before you start broadcasting and connecting with your attendees, you can:
-
Check if the system detects your mic and webcam;
-
Test the audio level.
And by clicking the camera and mic icons on the left side of the window, you can get a final preview of how you will look and sound during your conference.
Pay attention to:
-
Framing – is there anything in the background that can distract your audience?
-
Lighting – make sure there is no light coming from behind you as your face will not be visible.
If you want to plug in an external mic or a webcam, remember to click the “Refresh” button to make sure the system detects the device, and both are working with no problems.
If you’re happy with the result, you can either start your event at once or prepare your webinar room before your attendees show up. In both cases, your audio video settings will be saved.
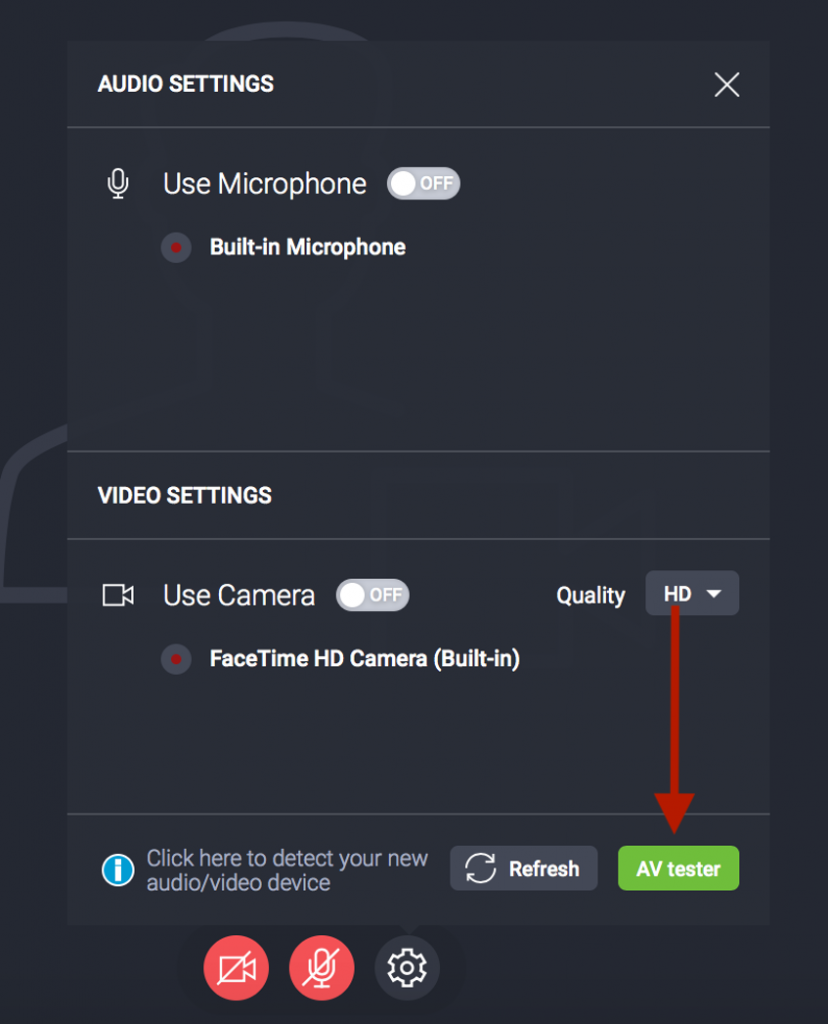
Remember, you can come back to your audio-video settings at any time. Just click the Audio-Video settings icon and then click the “AV tester” button at the bottom of this window.
What’s more, if you enable an attendee to be seen and heard during the event, the Audio Video Tester tool will also be available for them before they go live.
Mic and webcam test – broadcast like a pro
OK, so we have walked you through our two features that enable you to test your microphone and camera before you start broadcasting your webinar or an online business meeting.
Now it’s your turn! Create your ClickMeeting free trial account today and make sure your audience will see and hear you seamlessly.