The Moodle platform is undoubtedly the most popular learning management system. It is successfully used by small schools and training companies as well as large universities. In this article, you will learn what Moodle is and how e-learning leaders use it. You will also see how to integrate the LMS easily with the ClickMeeting platform.
Teaching online is very simple. On the other hand, running a school or training company is not limited to educational classes. It is crucial to have a platform that will guarantee access to courses. Moodle is a very popular system. Of course, this is primarily driven by the open access to this software. The ability to integrate Moodle with other tools, such as platforms for webinars and online meetings, is also a big benefit.
Table of Contents
What is Moodle?
E-learning is associated by many people, especially students or course participants, with platforms that allow them to participate in classes, solve tests, monitor learning outcomes or download additional materials. This type of service is created by many entities: it works well not only for universities, but also for elementary and secondary schools, language schools, private companies providing online courses, and even enterprises creating training for their own employees.
To provide this kind of platform, of course, it becomes necessary to develop specific IT solutions. However, this does not have to be done from scratch.
Moodle (Modular Object-Oriented Dynamic Learning Environment) is one of the most popular learning management systems, which allows you to prepare an e-learning platform tailored to the needs of a specific entity. It is a good choice both for beginners who want to create a basic system to streamline the course, and for large units that choose to prepare an extensive remote learning environment based on Moodle.
Moodle is the most popular LMS (Learning Management System) around the world. In total, it hosts more than 175,000 sites and 40 million courses created by educational entities from 244 countries. Up to half of e-learning platforms are estimated to use Moodle.

Pros of the Moodle platform
Why is the platform so popular? Here are some of its most important features appreciated by users around the world.
- Available at no charge: Moodle is released as open source software under the GNU GPL. This means that anyone can freely run the tools, analyze their performance, customize them, and distribute their own modifications.
- Scalability made easy: Do you create a course for your company’s employees or manage a small language school? Or maybe you are responsible for introducing e-learning to a large university? With the Moodle platform, you can handle any of these challenges. You will also be assured that the system will grow with your business.
- Easy to use: most importantly from the perspective of the user – both the instructor and the student – you don’t need anything more than an up-to-date version of your browser to use the potential of the software. A skillfully designed system will bring everything you need for online learning within a single service. All you need to do is log in, so you can take part in live classes, view recordings and download materials that supplement the course.
- Mobile technology support: the tool’s capabilities are extended by the Moodle Mobile App, which allows you to take the course using smartphones as well.
- An extensive community: for both the beginner and the advanced user, what matters is the community around the software. In the case of Moodle, it is truly impressive. This makes it definitely easier to implement modifications.
- Integration with other tools: Of course, the e-learning platform itself is not everything. You also need to provide it with solutions for, for example, delivering educational classes. You can easily integrate Moodle with platforms such as ClickMeeting.
When is it worth using an LMS?
As you can see, creating your own e-learning platform can be really simple. It is also by no means a tool reserved only for the largest entities or one that requires large investments. Moodle implementation is worth considering for:
- private and public schools,
- universities,
- online courses platforms,
- language schools,
- coaching companies,
- companies providing training for their own employees.
Open access allows you to create a site that is not only fully functional but also tailored to the branding of a particular organization. This will increase the prestige of your company or school and ensure consistency in all activities undertaken in the virtual space.
See how leaders leverage Moodle’s potential
How powerful is Moodle? This is best demonstrated by e-learning platforms used by thousands of teachers and tens of thousands of students. Here are two examples of solutions benefiting from the advanced integration of Moodle with ClickMeeting:
AGH University of Science and Technology in Krakow is the best technical university in Poland. The e-Learning Center is responsible for the implementation and development of e-learning methods there. 2,100 academic teachers and more than 23,000 students use the Moodle-based UPeL platform – it not only gives access to exercises and lectures held on the ClickMeeting platform, but also advanced modules to help manage the learning process.
Another example of a well-functioning platform based on Moodle is the eLearning Platform of the Gdansk University of Technology. It is used by 1,400 academic teachers and nearly 20,000 students. ClickMeeting’s open API allows for even more advanced integration with the tool.
Integrating Moodle with ClickMeeting step by step
Of course, the primary task of e-learning platforms is to provide contact between educators and class participants. To make this possible, you need the right platform for webinars and online meetings. This will allow you to create educational activities tailored to your needs – whether typical lessons or practical exercises in smaller groups, as well as lectures or conferences for hundreds of participants.
Check out how to easily integrate Moodle with ClickMeeting:
By integrating your school’s remote learning platform with your ClickMeeting account, you’ll be able to schedule remote classes, invite attendees, teach in a virtual classroom, view event statistics, check test scores, or download recordings.
To integrate Moodle with ClickMeeting, you will need full access to both accounts.
Please note that your Moodle system and ClickMeeting integration may look slightly different than ours. With ClickMeeting’s Open API, any administrator can modify the design and functionality of the integration.
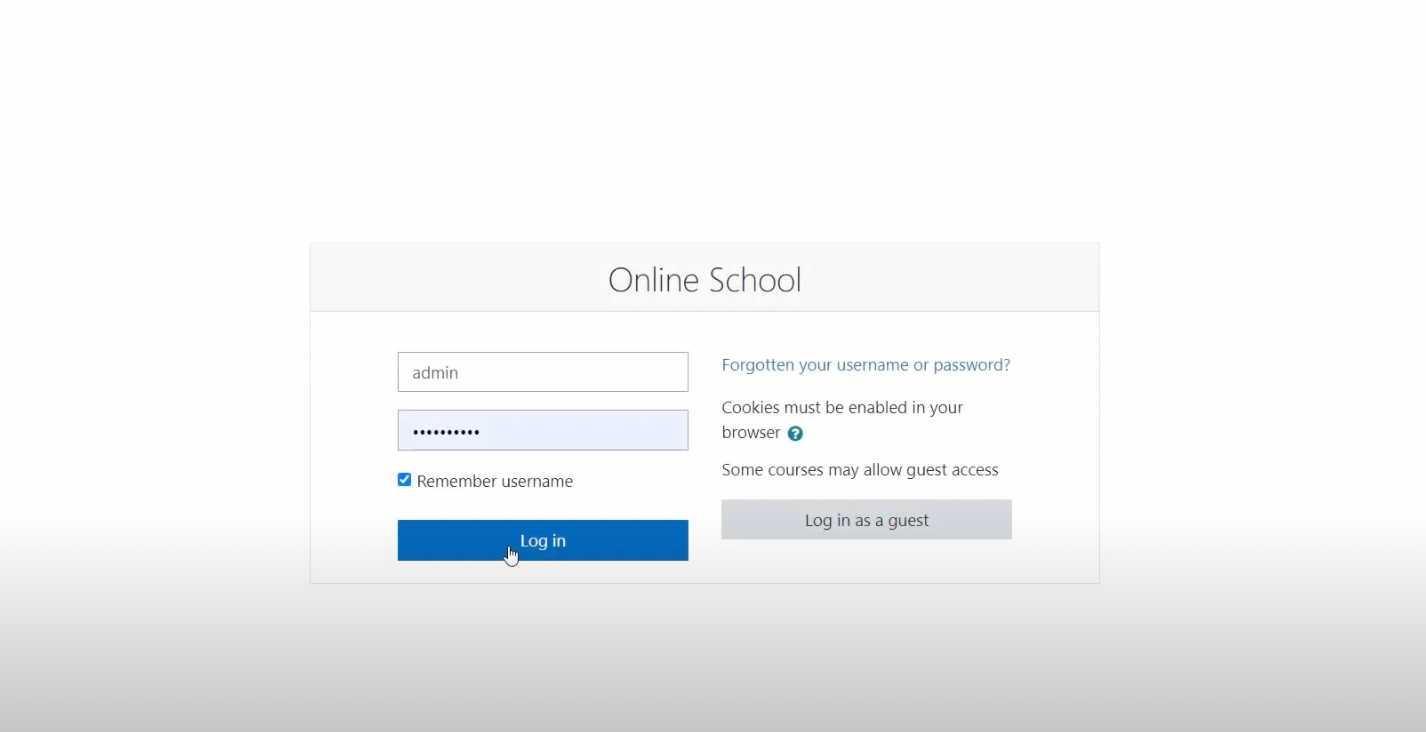
Log in to your Moodle account with administrator permissions and go to the “Site administration” page. Then select the “Plugins” tab and click “Install plugins.”
Now you will need the ClickMeeting plugin. You can find the link to download the zip file here: https://integrations.clickmeeting.com/integration/moodle/
Drag the downloaded file and drop it in this box. Confirm the installation and follow the next steps.
Once the installation is successful, go to the “Plugins” tab again, but this time click “Plugins overview.” Find “ClickMeeting” in the list and proceed to settings.
This is the final step of the integration. You’ll need an API key, which you can find quickly in your ClickMeeting account. Log into it and go into your account settings. Select the last tab – “API.” Click on “add new”, enter a name – e.g. “moodle”. Then “save” and “copy”.
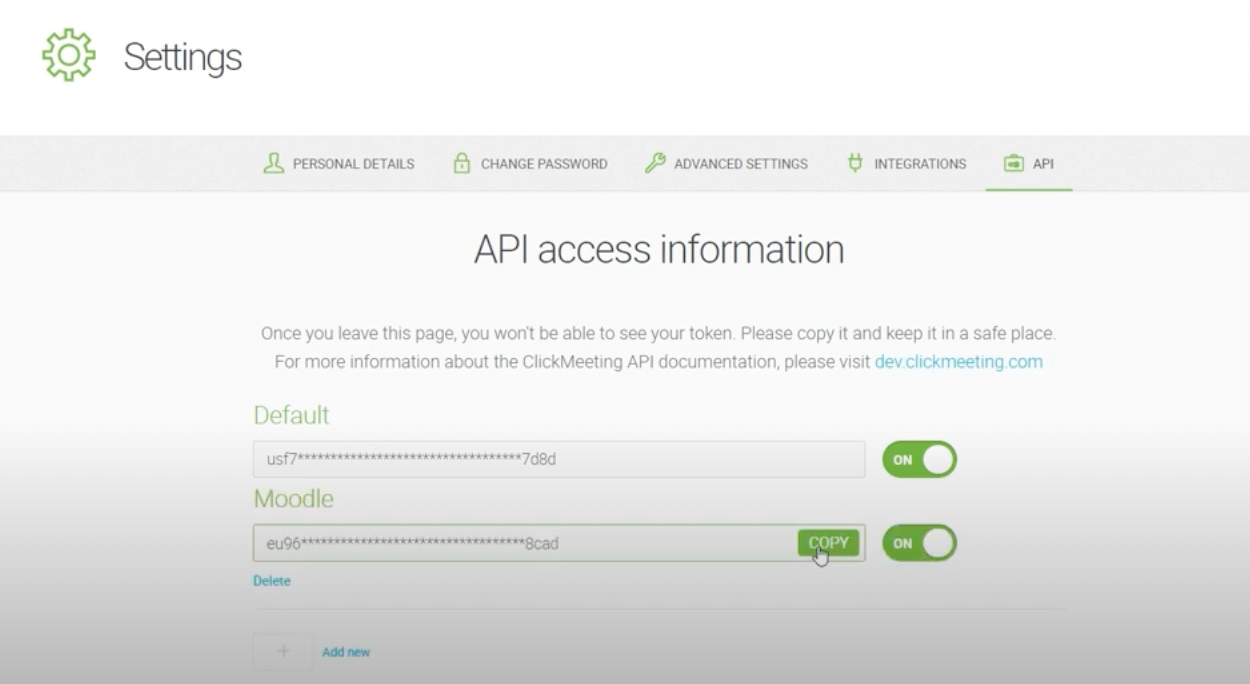
It’s time to go back to Moodle. Paste the copied key here and confirm with the button below. Done!
Now it’s time to create your first course using the virtual classroom. Go to the Courses tab and create a new course.
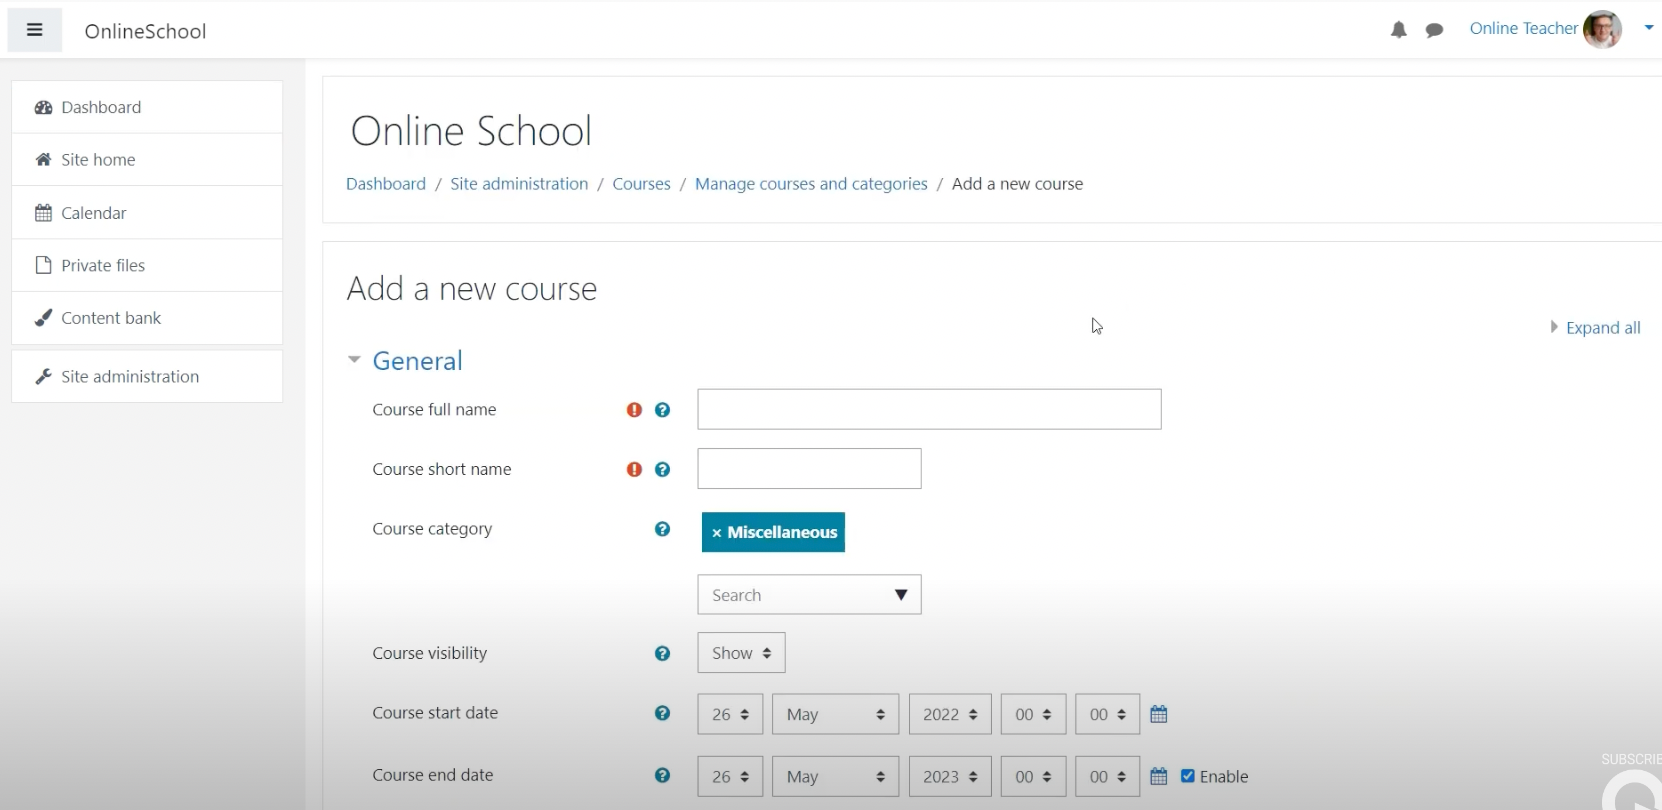
Give it a name, choose a date and fill in all the necessary details, then go to the “course format” section. From the first drop-down menu, select “single activity format.” Now specify the activity type by selecting “Virtual class” from the 2nd menu. When everything is ready, save the course by clicking on the button below.
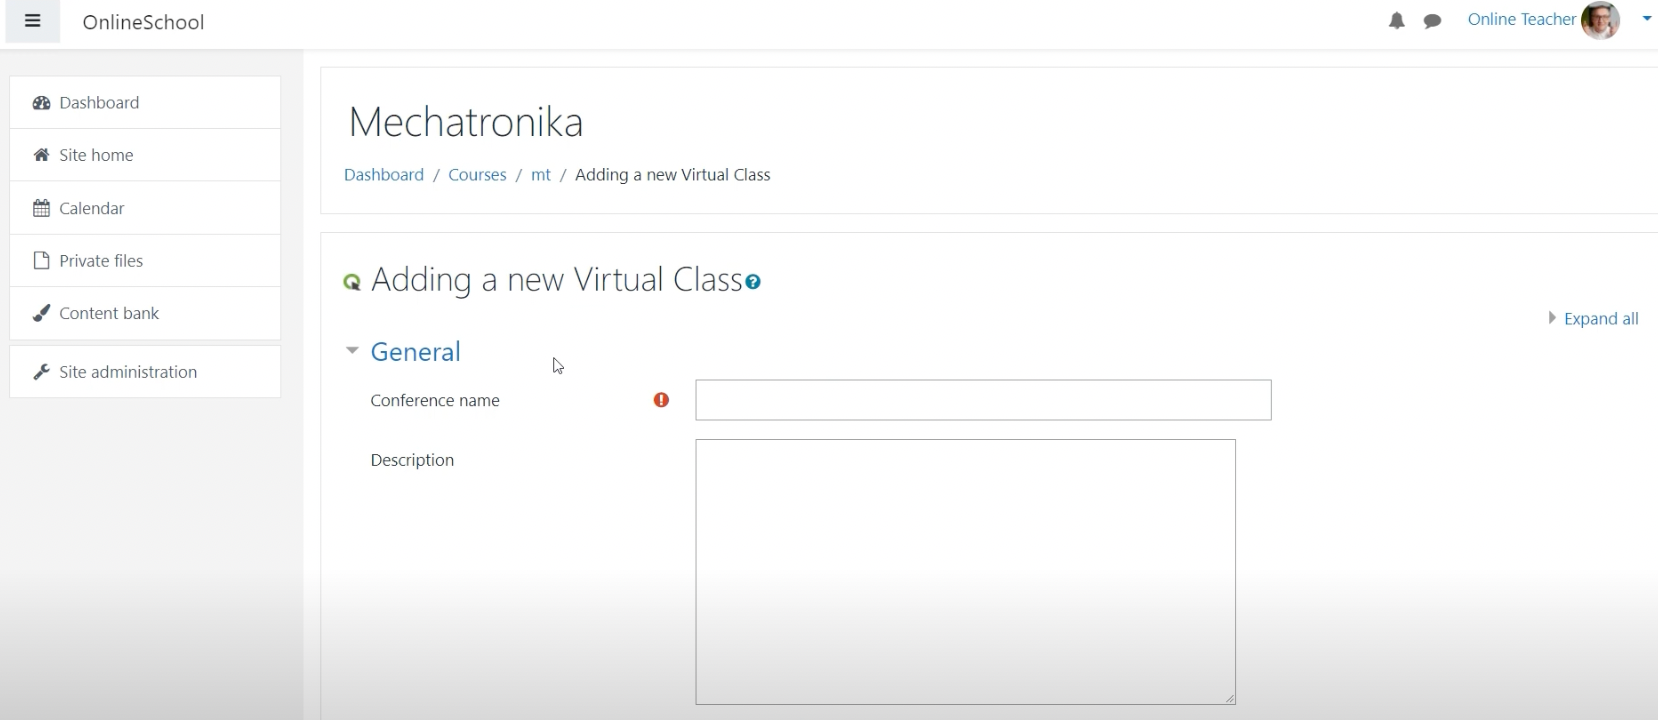
Click on the course you created. It is here that you will create a virtual online class. Give them a name and description. If you want the class to be a lecture, select “webinar”. If you would like to give students the opportunity to speak using a microphone or camera, select “meeting”.
Determine the form of access protection. You can choose open, password-protected, or one-time token classes.
Set a start date and specify how long the class will last.
Save everything by clicking the button at the bottom of the page, and that’ s it!
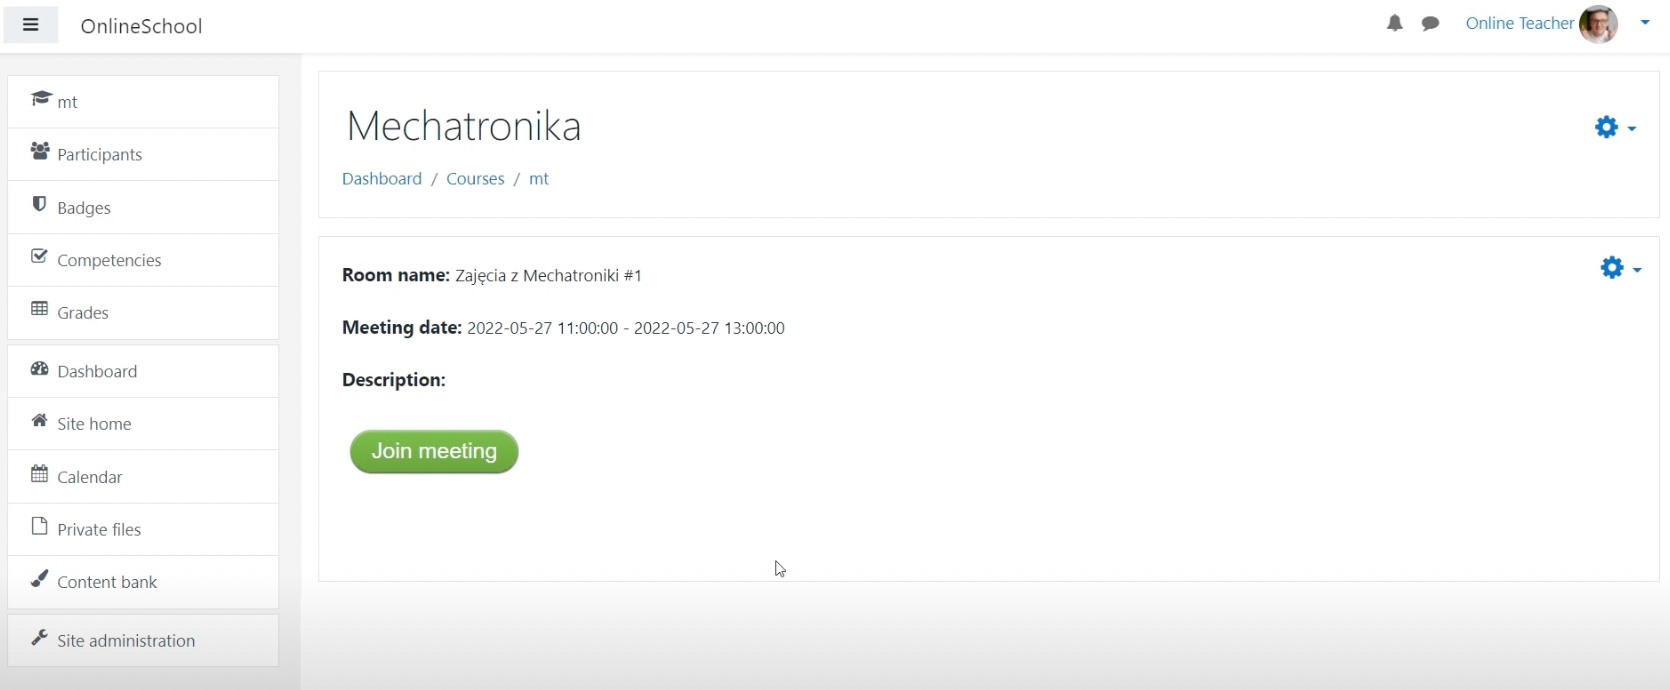
You can enter the classroom at any time by clicking on “join meeting”.
This will bring up a new window in the virtual room where you’ll be hosting the class. If you want to record it, choose the recording view and start it by clicking here. If you are running a test, you will only get summarized results in the virtual room. You will see the detailed answers of specific students one hour after the event in your Moodle dashboard.
Once you have completed the activity, return to the course tab.
Click here to generate and download a report. You will find a list of attendees, statistics, and the answers given by specific students during the tests.
You can also download a recording of your lessons here.
Everything you need for online learning is in one place!
