Dividing your online event into several smaller, closed sessions happening at the same time is a perfect way to make more room and create more interaction for your students or trainees to explore a particular topic. Breakout rooms are the tool you need to make that happen. In this article, we will show you how to do it.
But before we take off, let’s find out what’s hiding behind this term. What are breakout rooms? Why are they so essential in terms of running online events for educational purposes?
Table of Contents
What are breakout rooms?
Breakout rooms are a tool provided by a web conferencing platform that enables a host to split the event’s attendees and distribute them to smaller rooms dedicated to working on a specific subject. Those breakout rooms are closed, interactive sessions where all attendees can turn on their webcams and mics, share their screens, or upload materials. 
WIIFM – How to know if breakout rooms are for you?
Making a shift to an online world with education and business communication is now inevitable yet highly rewarding. E-learning and online training business have been steadily growing long before the major seismic activity caused by the pandemic.
But right now – running virtual classrooms or training sessions via the online meeting platforms is the only way to go.
However, if you want to entirely replace good-old in-person teaching and training with its digital successor, implementing a robust video conferencing platform is just a beginning.
Next, if you…
Teach your students online…
You will need a function to assign them to smaller, virtual classes. For instance, if you are a university lecturer, you will need to gather up a hundred (or so) students in one online event that would substitute for a traditional lecture hall.
But within that lecture, you would need to create separate workshop groups and assign students to work together in a particular area. And breakout rooms are an incredibly easy way to do it.
Also, if you…
Run professional training sessions
Then, you will also find this feature super handy. Imagine that over 300 people signed up for your “Become a Python developer today” course. As the goal is to introduce newbies to a Python world, the introduction about the basics would be the same for everyone.
But then, you would like them to play around with code in smaller groups and deliver some simple applications at the end. And this is where breakout sessions come into play!
But what if you…
Work on your projects remotely
Yes, you don’t educate or train other people, but you manage a remote team that works on complex projects. Let’s say your company needs to roll out a brand-new product that requires engagement from different departments.
Going through brainstorming sessions where dozens of team members need to have a say would end up in chaos and frustration. But breaking them down into separate groups of, let’s say, ten professionals would make much more sense.
And that’s where creating breakout rooms within a larger online session also comes into play.
And last, this feature will be your natural ally if you…
Host interactive workshops during your virtual conferences
Moving an onsite conference to the online world is something that we see very often nowadays. Back in the day, traditional events held in brick-and-mortar venues allowed attendees to join thematical workshops organized on smaller stages (in the shadow of the main stage).
Dividing your large-scale virtual event into isolated breakout rooms applies here perfectly! If you host a conference about digital marketing, creating smaller rooms to run workshops about SEO, content marketing, or social media turns out as a brilliant idea.
How to create breakout rooms
OK, so regardless of whether you are an:
- Online teacher,
- Online trainer,
- Remote team manager,
- or online conference host,
…you should follow the same path to create breakout rooms within your online event. And, as promised, it’s ridiculously simple!
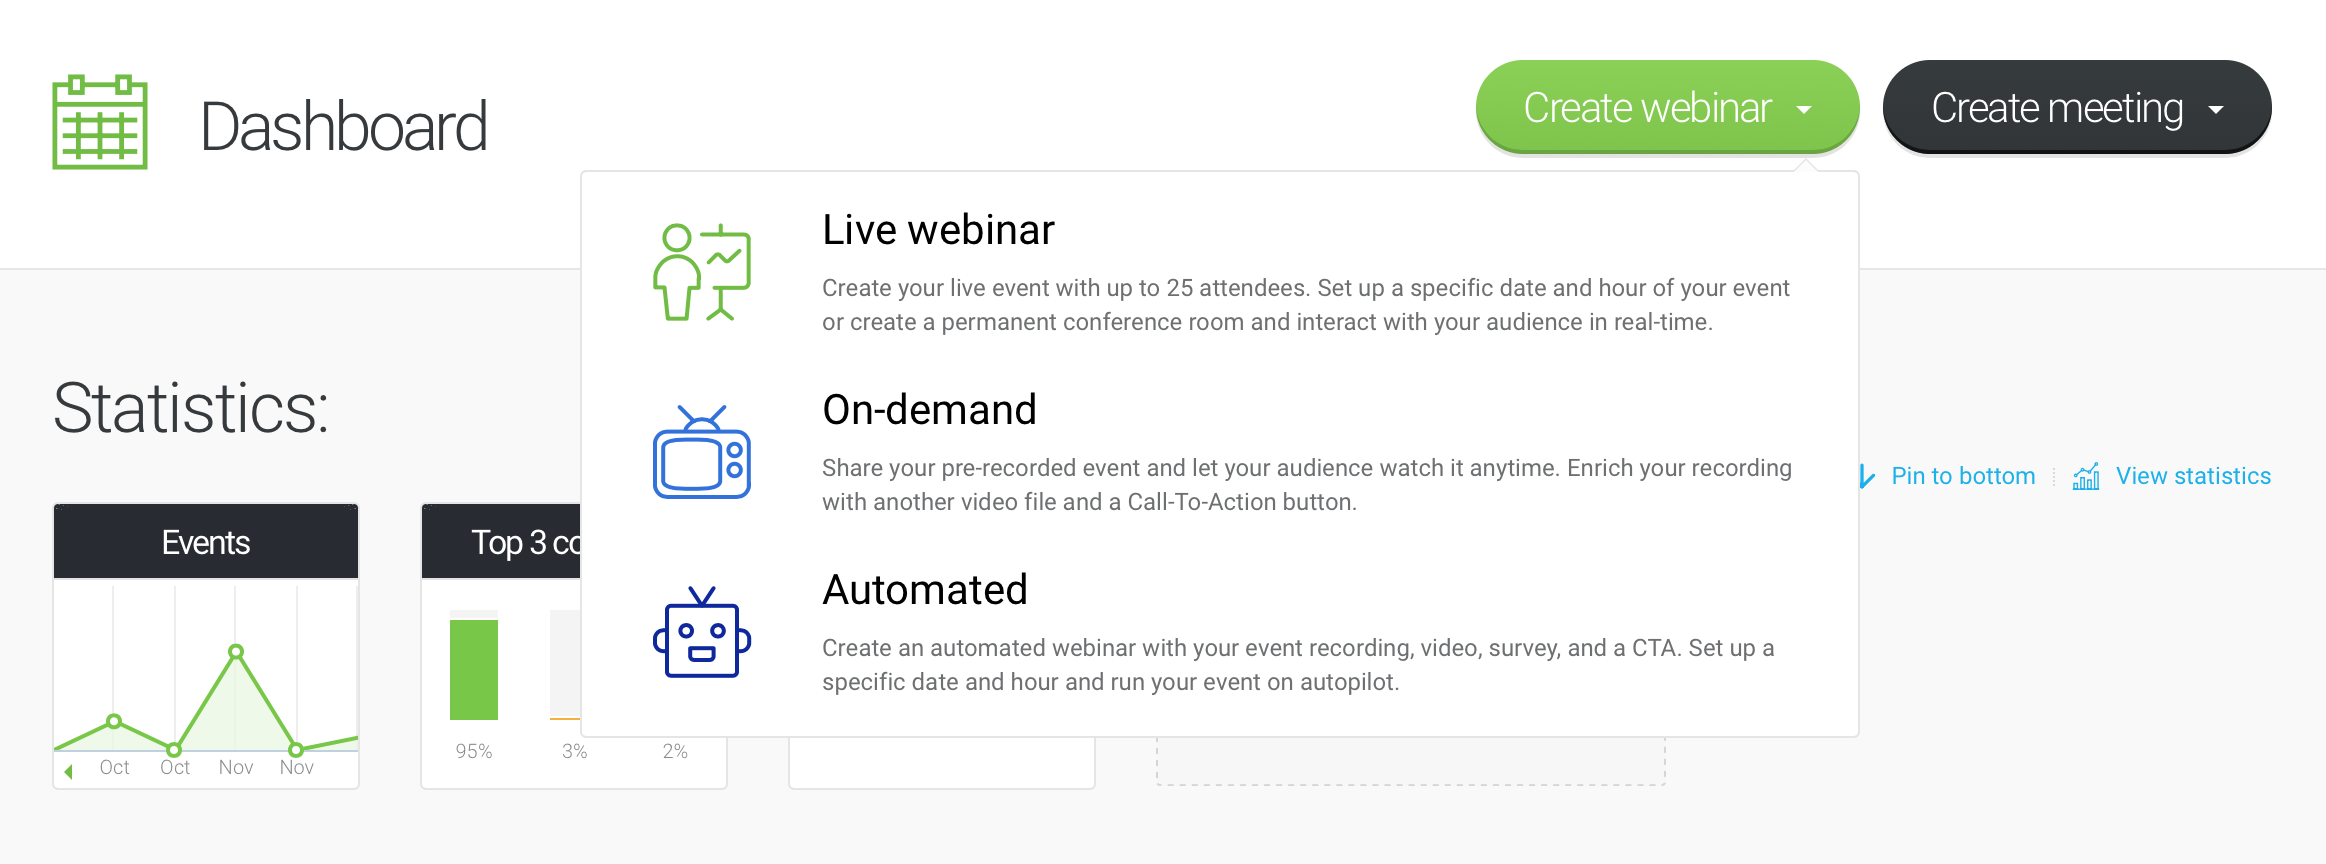
Step 1: Create your online event
After logging in to your ClickMeeting account panel, hover over the “Create webinar” button and choose the “Live webinar” option.
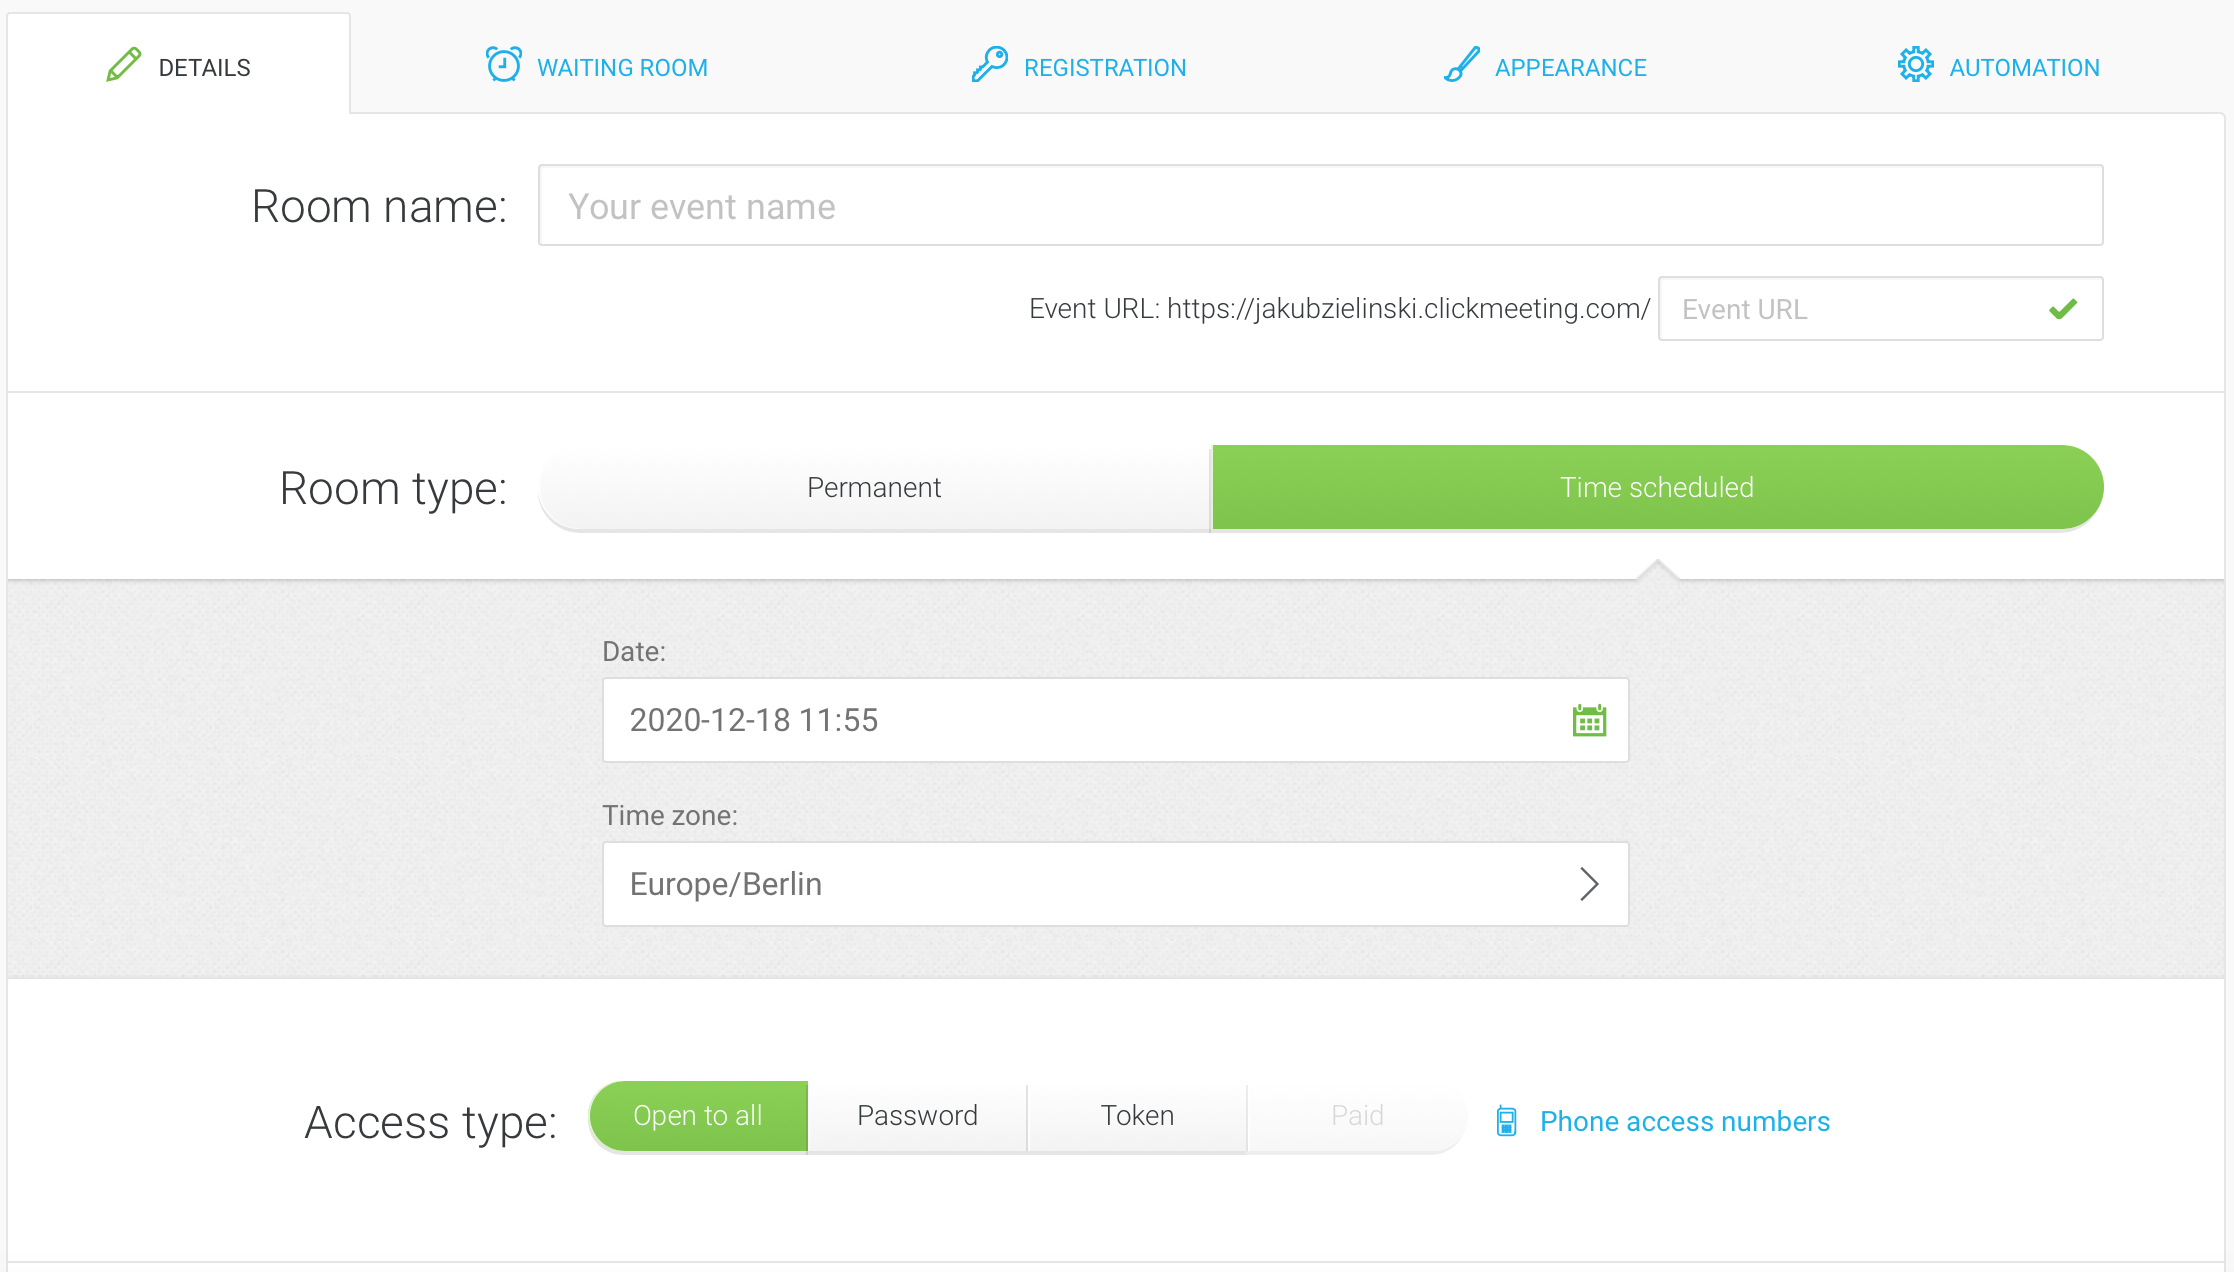
Step 2: Set up your event
Then, you’re about to enter the name of your digital gathering, set up a date, hour, and your time zone. Next, you can decide whether your event is open to all, protected by a password or a unique token, or requires payment for access.
PRO TIP – here’s everything you need to know about paid events.
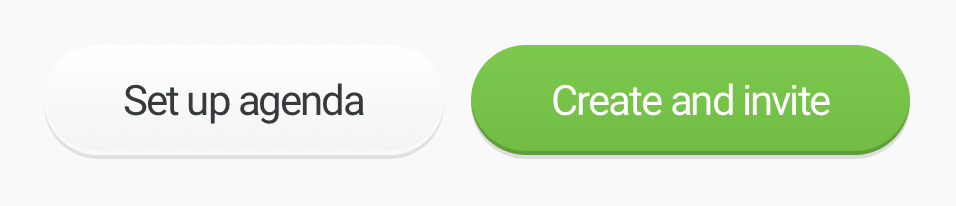
Once you have that sorted out, click the “Create and invite” button.
Step 3 – Invite your attendees
Next, it’s time to send the invites to your online event to get your students, trainees, or team members to sign up for it.
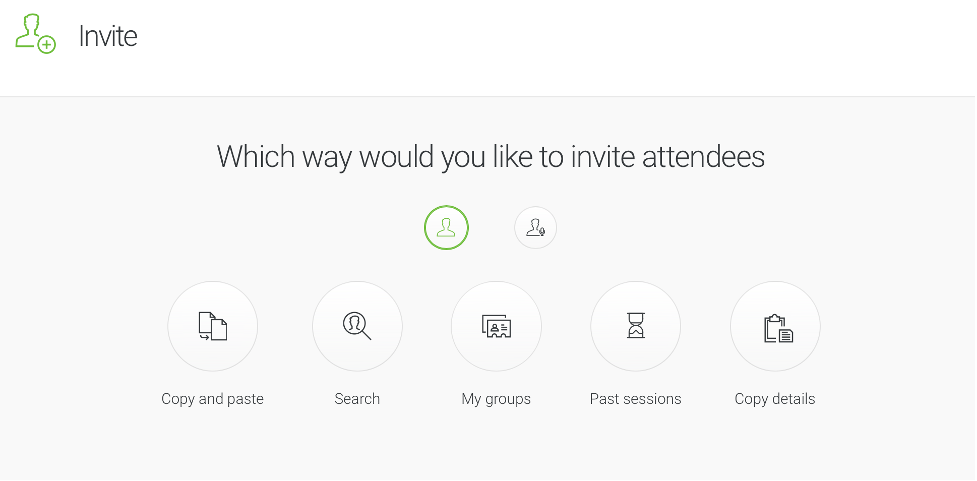
You have a few options to choose from, but if you’re just starting, “Copy and paste” would be the best thing to do at this stage.
Step 4 – Join your event and create breakout rooms
When your online session is about to begin, it’s time for you to enter the event room. Once you join it, move your pointer to the left-side menu. Right at the bottom of the list, you will find the “Breakout rooms” feature.
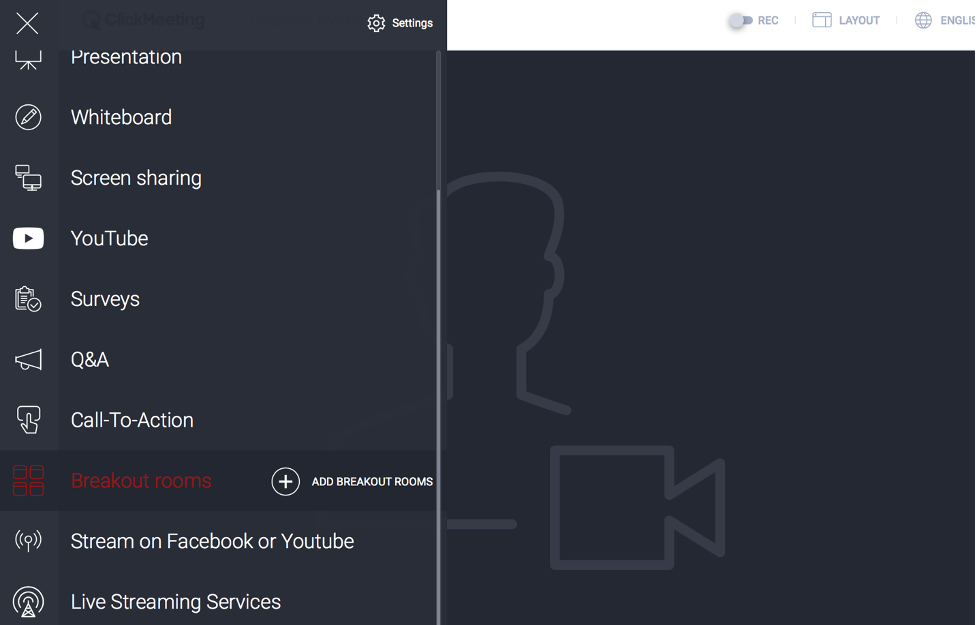
As your intuition tells you, clicking the “Add” option is your next move.
Once you do that, you will see this pop-up:
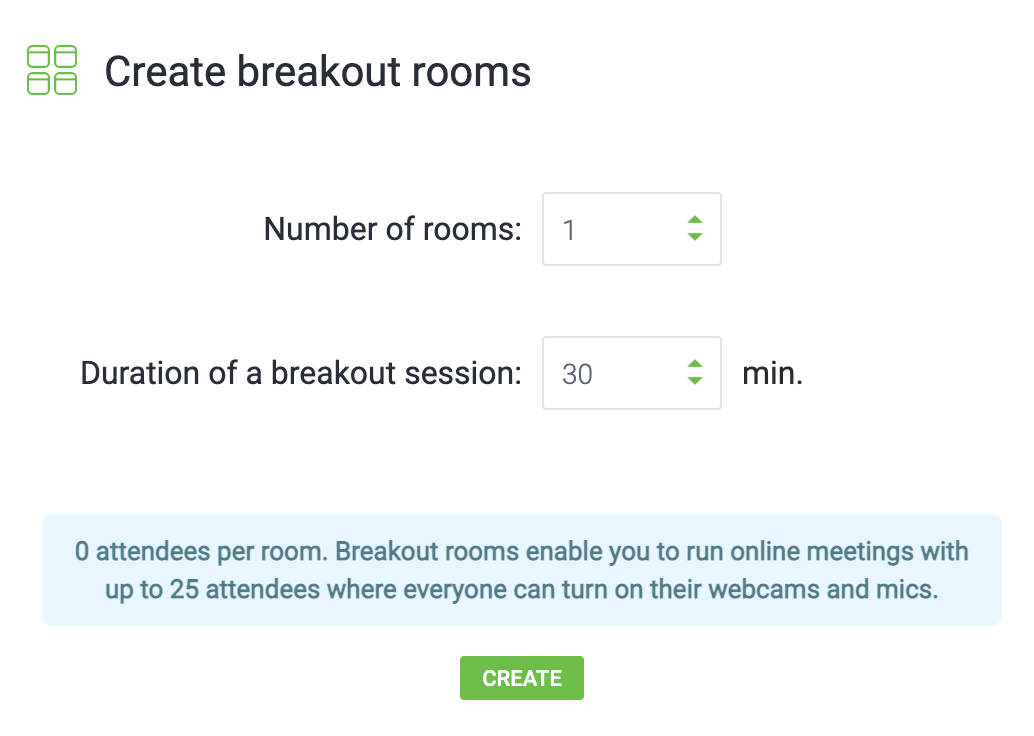
As you can see, you can set up the number of rooms (a maximum of 20 rooms) and decide about how long those online sessions should take. Will your attendees need 30, 45, 60 minutes, or maybe 10 hours? It’s your call!
When you’re ready, click the “Create” button, which will let you…
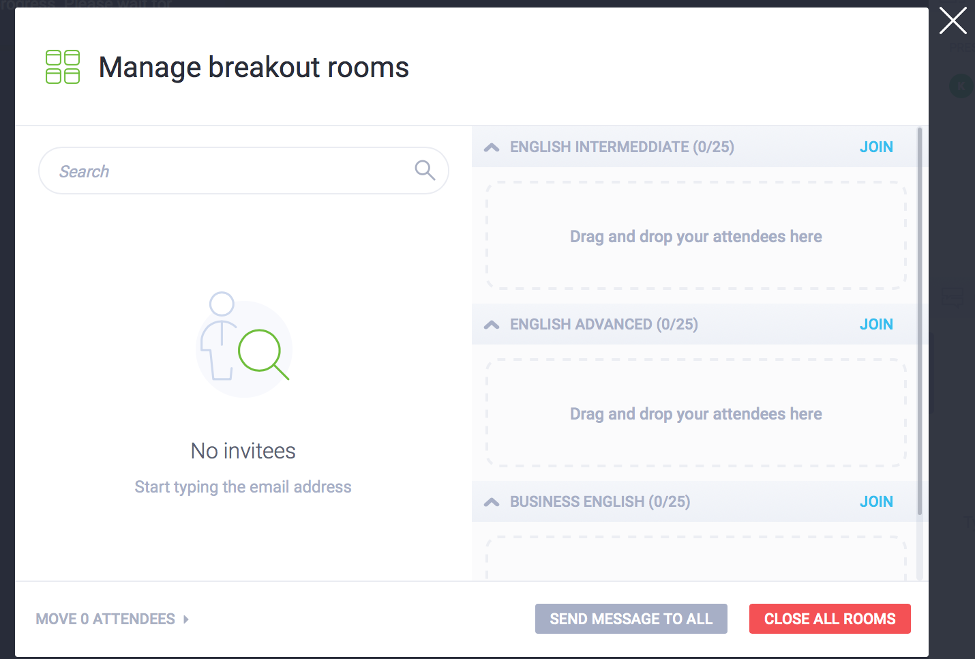
Step 5 – Manage your breakout rooms
At this stage, you can decide which attendees take part in which breakout room. To do it like a pro, it’s best to set up specific names for each room instead of leaving generic “BREAKOUT ROOM 1” or “BREAKOUT ROOM 2” names.
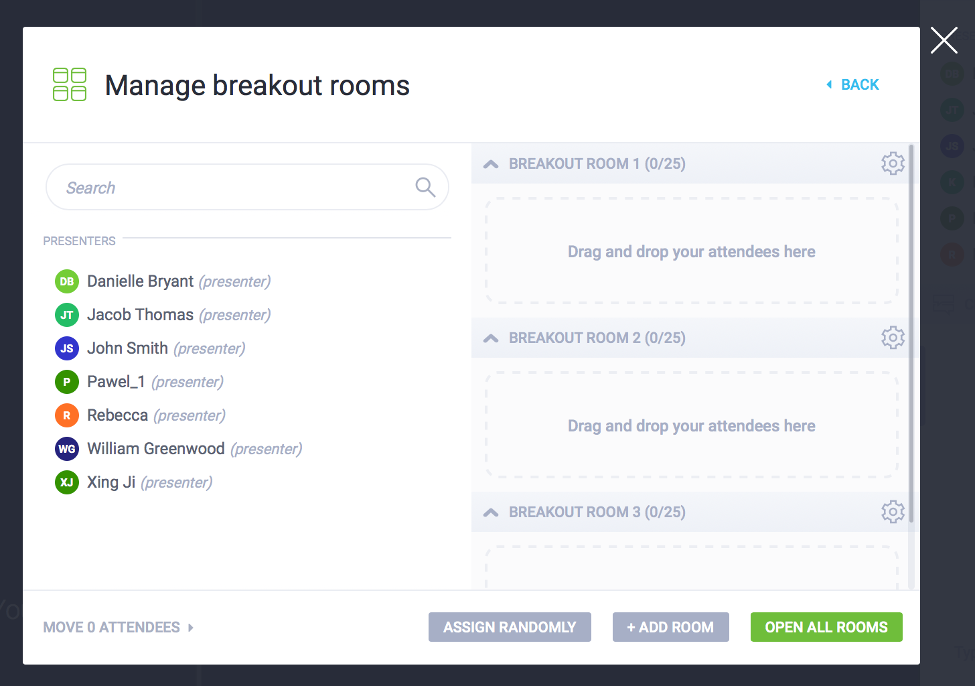
Then, it’s time for you to assign your attendees to rooms of your choice. If you want to do it randomly, just hit the “Assign randomly” button.
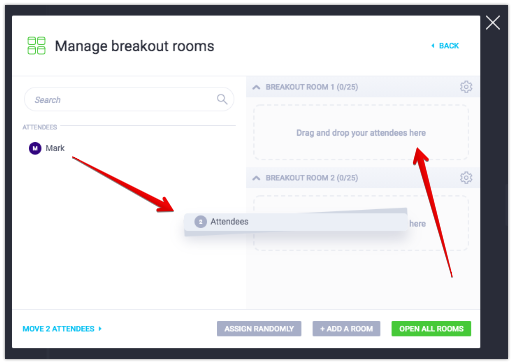
However, if you prefer to do it manually, click on selected attendees. You can do it faster by pressing Shift on your keyboard. Next, assign them to a chosen room with a simple drag and drop. Repeat this action for the rest of your attendees. If you change your mind, click the desired name and drag and drop it into another room.
When you finish distributing your attendees to created rooms, you can start the sessions within them by clicking the “Open all rooms” button.
And it’s on! Your students, trainees, or team members can now profoundly focus on a given topic.
Step 6 – Run your breakout sessions
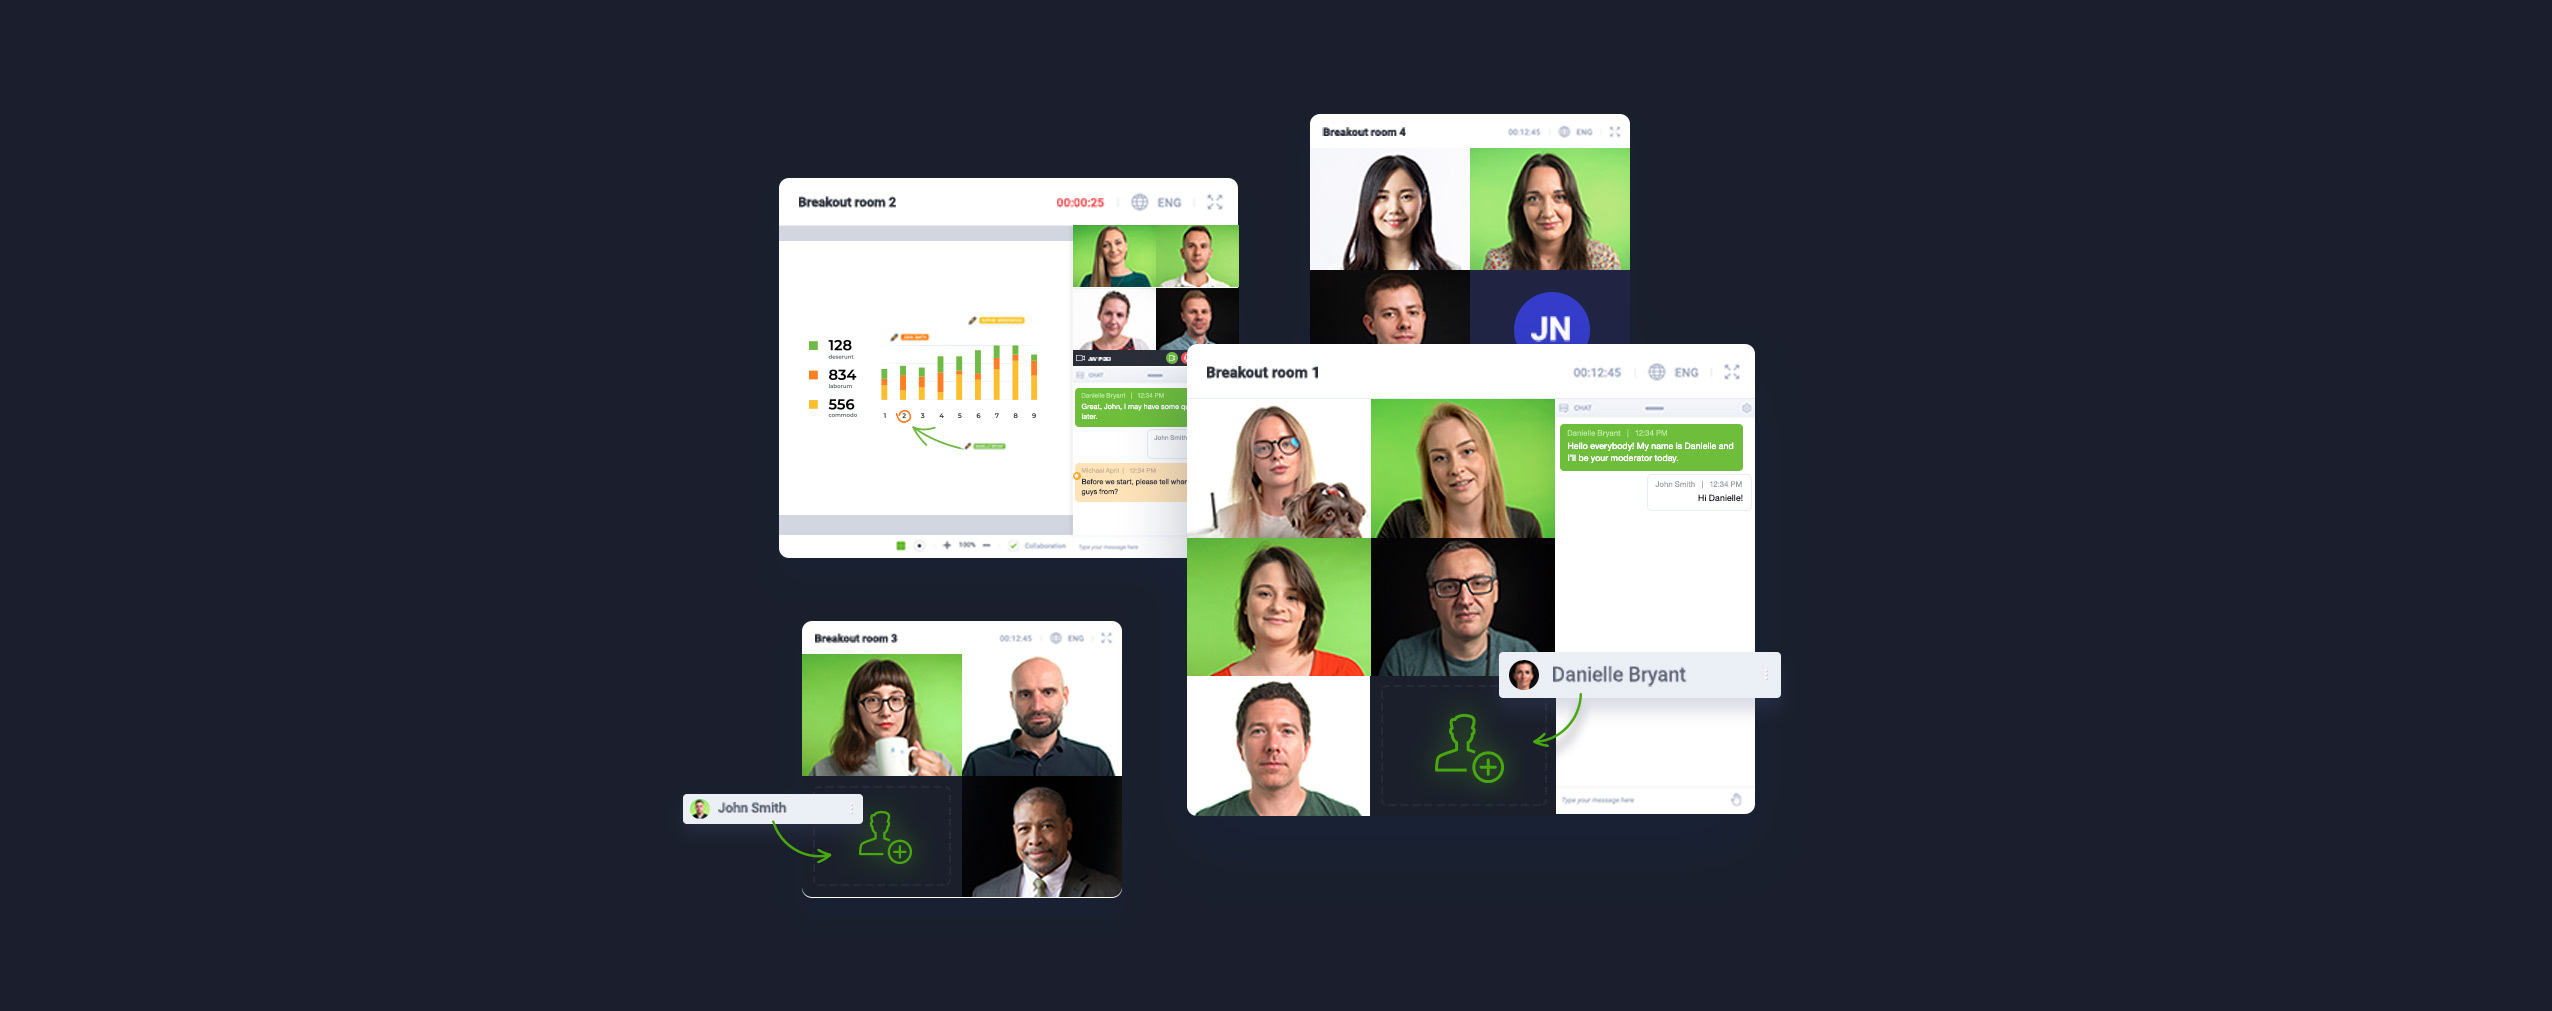
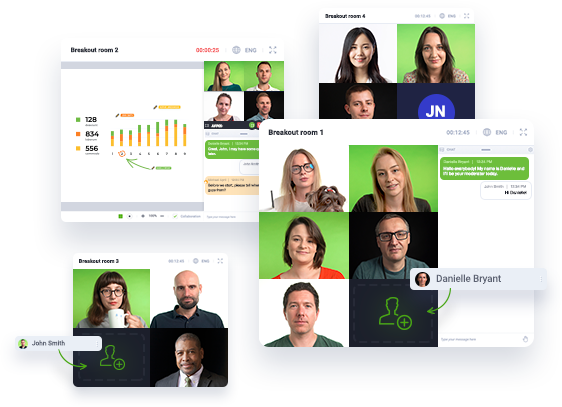
At this stage, you should know that each created breakout session works like an online meeting on the ClickMeeting platform. It boils down that up to 25 people gathered in the room can interactively collaborate by turning on their webcams and microphones.
Yes, all attendees can see, hear, and talk to each other. But there’s more! Each attendee can share a screen to show a document or a piece of software, draw supportive visuals or put down notes on a digital Whiteboard, or see uploaded materials such as a PowerPoint presentation, Word document, a spreadsheet, or a video clip!
It’s essential for you as a host to stay on top of all the rooms and have everything under control. For instance, you can decide which room to join to moderate or give a helping hand.
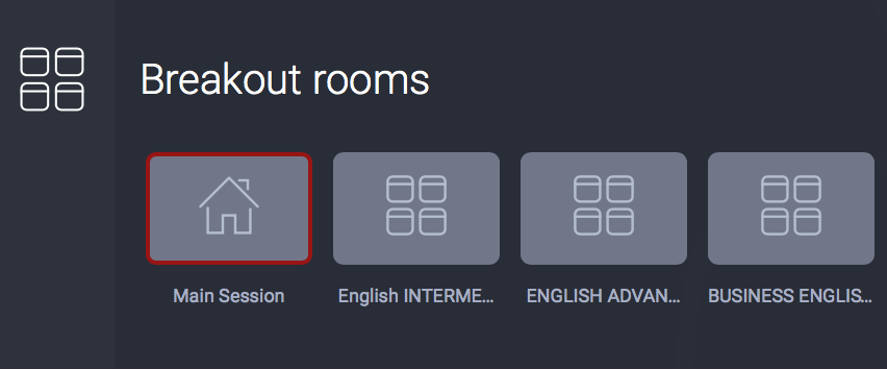
You can find the list of your rooms on the left side menu:
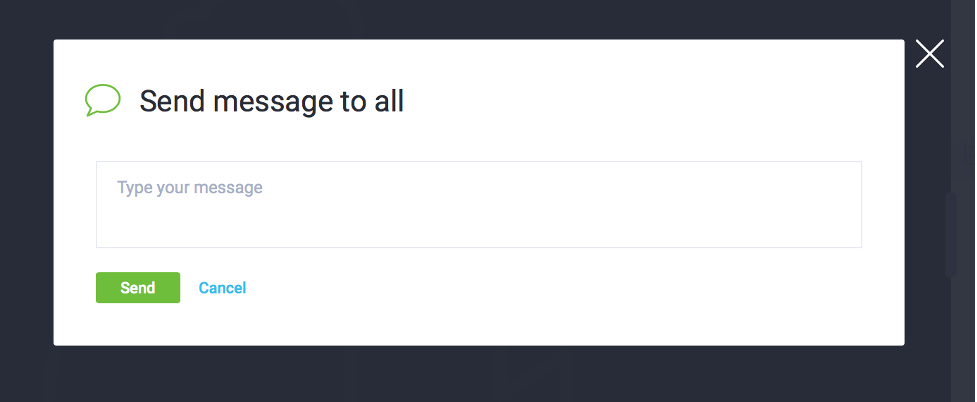
But you can also communicate with all the attendees at once. You can send a chat message that everyone will see if you want to inform your groups about something without jumping from one room to another.
All you need to do is to get back to the “Manage breakout rooms” window and click the “Send a message to all” option at the bottom:
Right after that, you can type in whatever you want to communicate, and all your attendees will see the message no matter in which room they are.
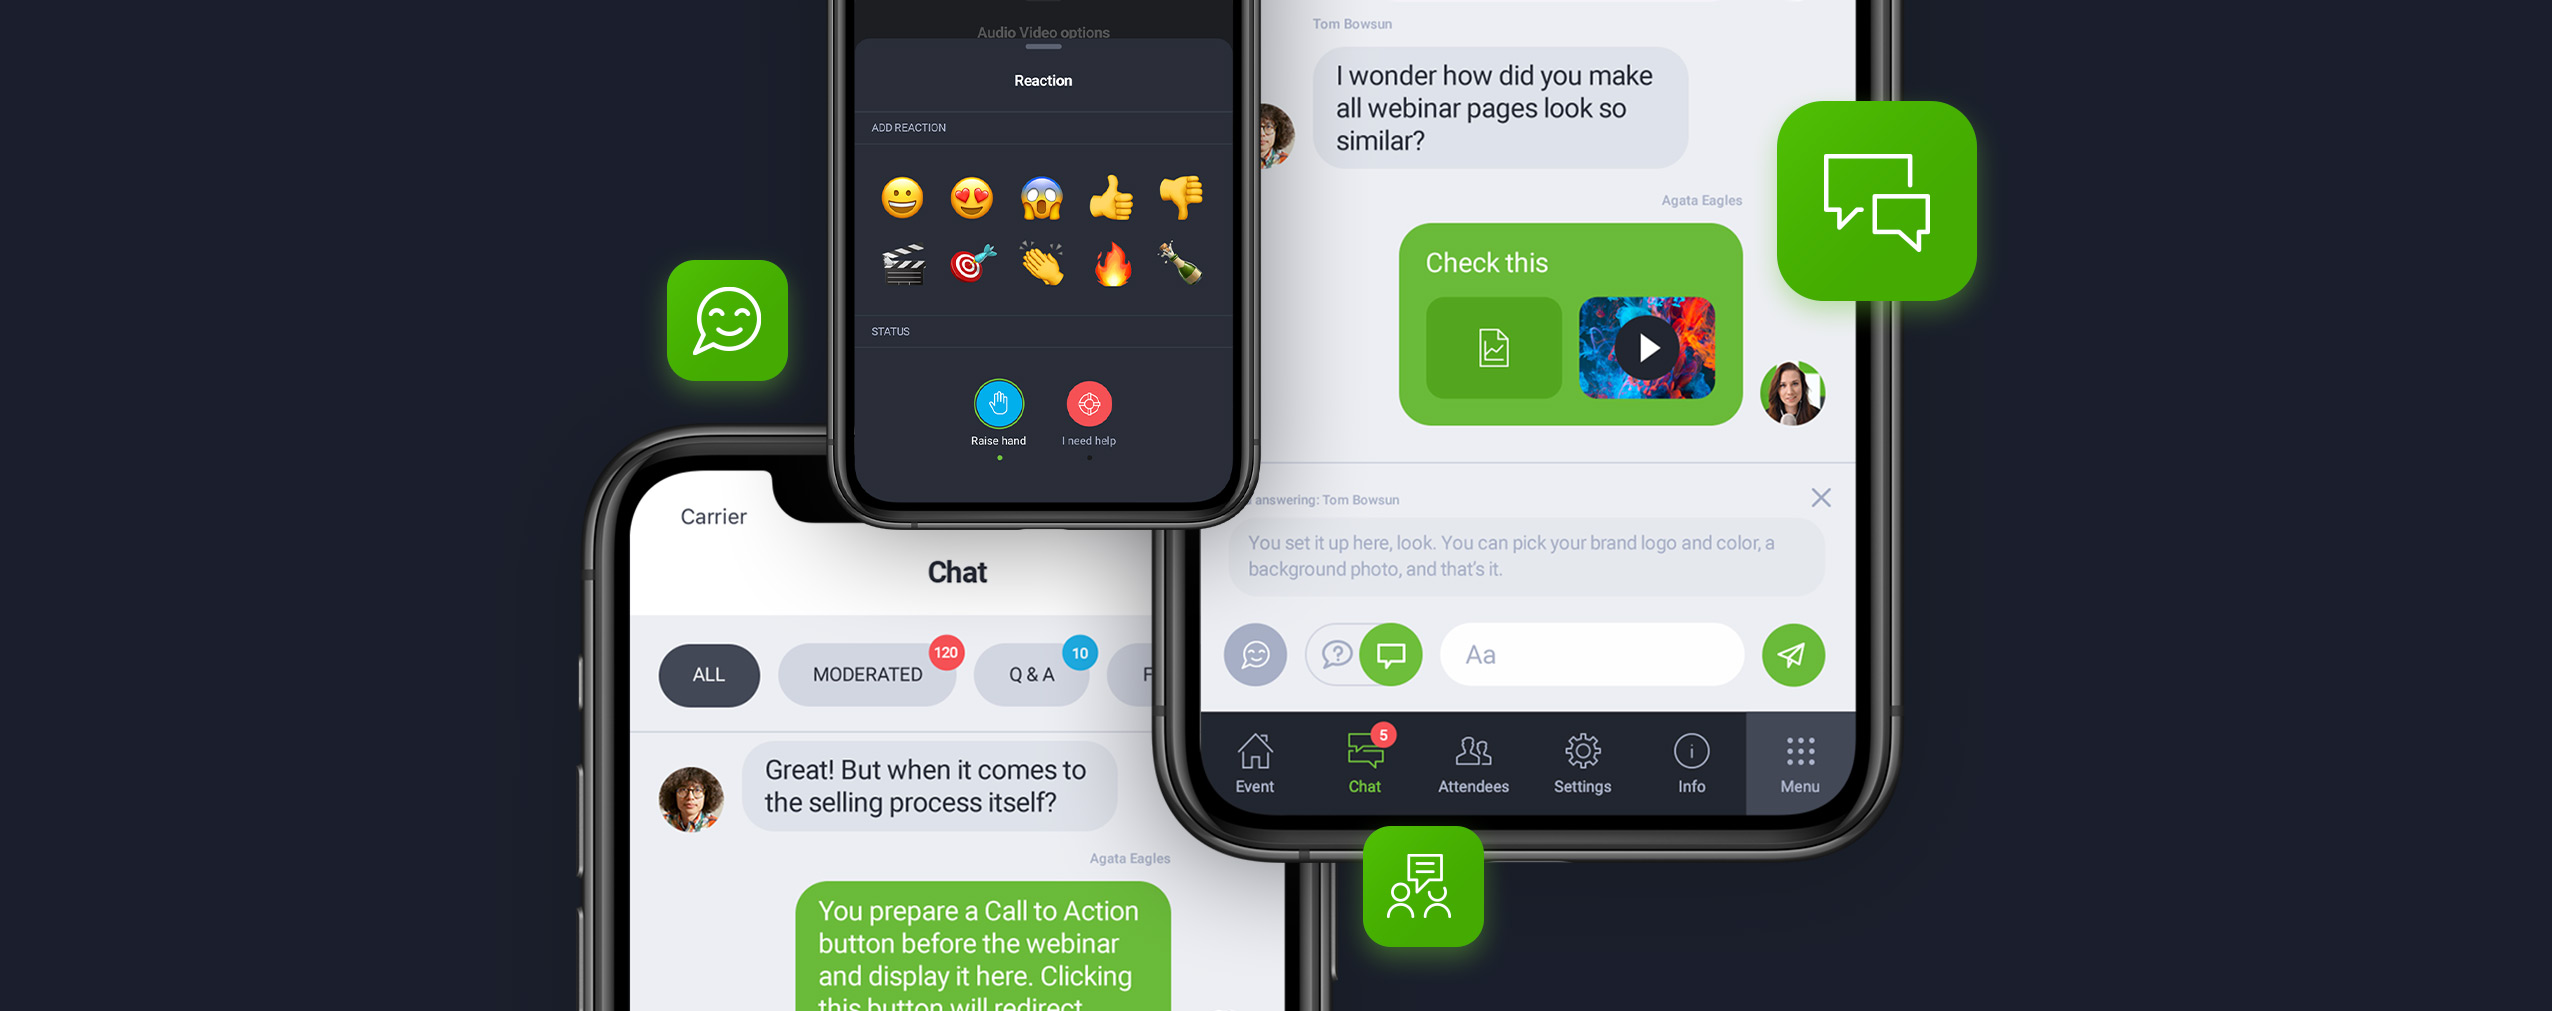
And when an attendee requires your assistance, but you’re in a different group at the moment, they can let you know by clicking the “Need help” status available in the chat window.
Step 7 – Add more time if you need it
Let’s say you set up an hour of brainstorming for your breakout sessions, and it might not be enough for each group. What if it turns out that 60 minutes was an underestimation and your attendees need another 20 or 30 minutes?
The good news is we made sure that you won’t be a prisoner of the initially established time.
Shortly before you reach the end of your session, you will see this notification:

How cool is that? You can add as much time as you and your attendees need!

As soon as you’re ready to wrap up your breakout event, attendees from all rooms will automatically rejoin the main session. And voilà – your online event divided into breakout rooms is done!
Why ClickMeeting is an excellent choice for running breakout rooms?
All in, breakout rooms are an irreplaceable tool that lets you split your online event into smaller, more interactive groups:
- Virtual classrooms;
- Training sessions;
- Remote team meetups;
- Interactive workshops.
Once you enter your online event, you can easily create up to 20 smaller rooms where up to 25 people can focus on a more productive way of learning.
Those separate events have all the online meeting features:
-
Option to turn on a webcam and mic for every attendee;
-
Screen sharing for each person in the room;
-
Drawing on a whiteboard – also for everyone!
But there’s more! Breakout rooms are:
-
Well-protected – their URLs are not public, so no one uninvited can get through;
-
100% no-install solution, which means your attendees can join them through a desktop browser;
-
Super mobile-friendly – hosts, presenters, and attendees can participate in an event with their mobile devices, using a mobile app or a mobile browser.
So, how can you start running events in breakout rooms?
This tool is available for Live and Automated Plans (with 50 attendees and above).