We are continuously developing ClickMeeting. Recently, we’ve introduced several important changes that will make your events even more interactive, and the whole platform easier and more intuitive to use. Learn about the latest updates and see how they can improve your day-to-day workflow.
New ClickMeeting features are useful for organizers and presenters, as well as a webinar and online meeting attendees. And, as with all things, it’s all about intuitiveness. Take a look at the material below. You’ll be able to use the new features of ClickMeeting in no time.
Table of Contents
ClickMeeting plug-in for MS Outlook
Organizing online meetings is even easier. You don’t have to log into your ClickMeeting account to create a meeting, edit its name, and send invitations to attendees. Just check the new free add-in for Microsoft Outlook. You can use it in both the desktop mail application and the browser version.
How does the add-in work?
With the ClickMeeting add-in for Microsoft Outlook you will be able to:
- Create an online meeting directly from your mailbox or select one of the pre-prepared events in your ClickMeeting account,
- Edit the name of the meeting,
- Send invitations to attendees,
- Prepare an invitation message,
- Password-protect an event or create an open event,
- Synchronize the event with Outlook calendar.
How to use the add-in for MS Outlook?
It only takes a few clicks to start using the ClickMeeting add-in and then create online meetings via Outlook. 
First, download the add-in in the Outlook application or through the browser-based version.
The first time you launch the plug-in, you’ll need to link Outlook to your ClickMeeting account. To do this, log in to the platform with your username and password.
From then on, you can easily create events without leaving MS Outlook!
Select the “New Meeting” option in the Outlook calendar, indicate the start and end time of the event, and enter the email addresses of the attendees. In the editor, type the meeting invitation message. In the add-in panel, you can set, among other things, the name of the event and the password for access (of course, you can also create an open meeting). Then select the “Add event” option and send the invitation message to your attendees.
Instead of entering details for a new event, you can also use the drop-down list of previously held meetings.
Your meeting attendees will receive an email containing the prepared invitation text, a password (optional), and a link to log into the room. After clicking the link, they will be asked for their name, email address, and password if you choose to use it.
Done!
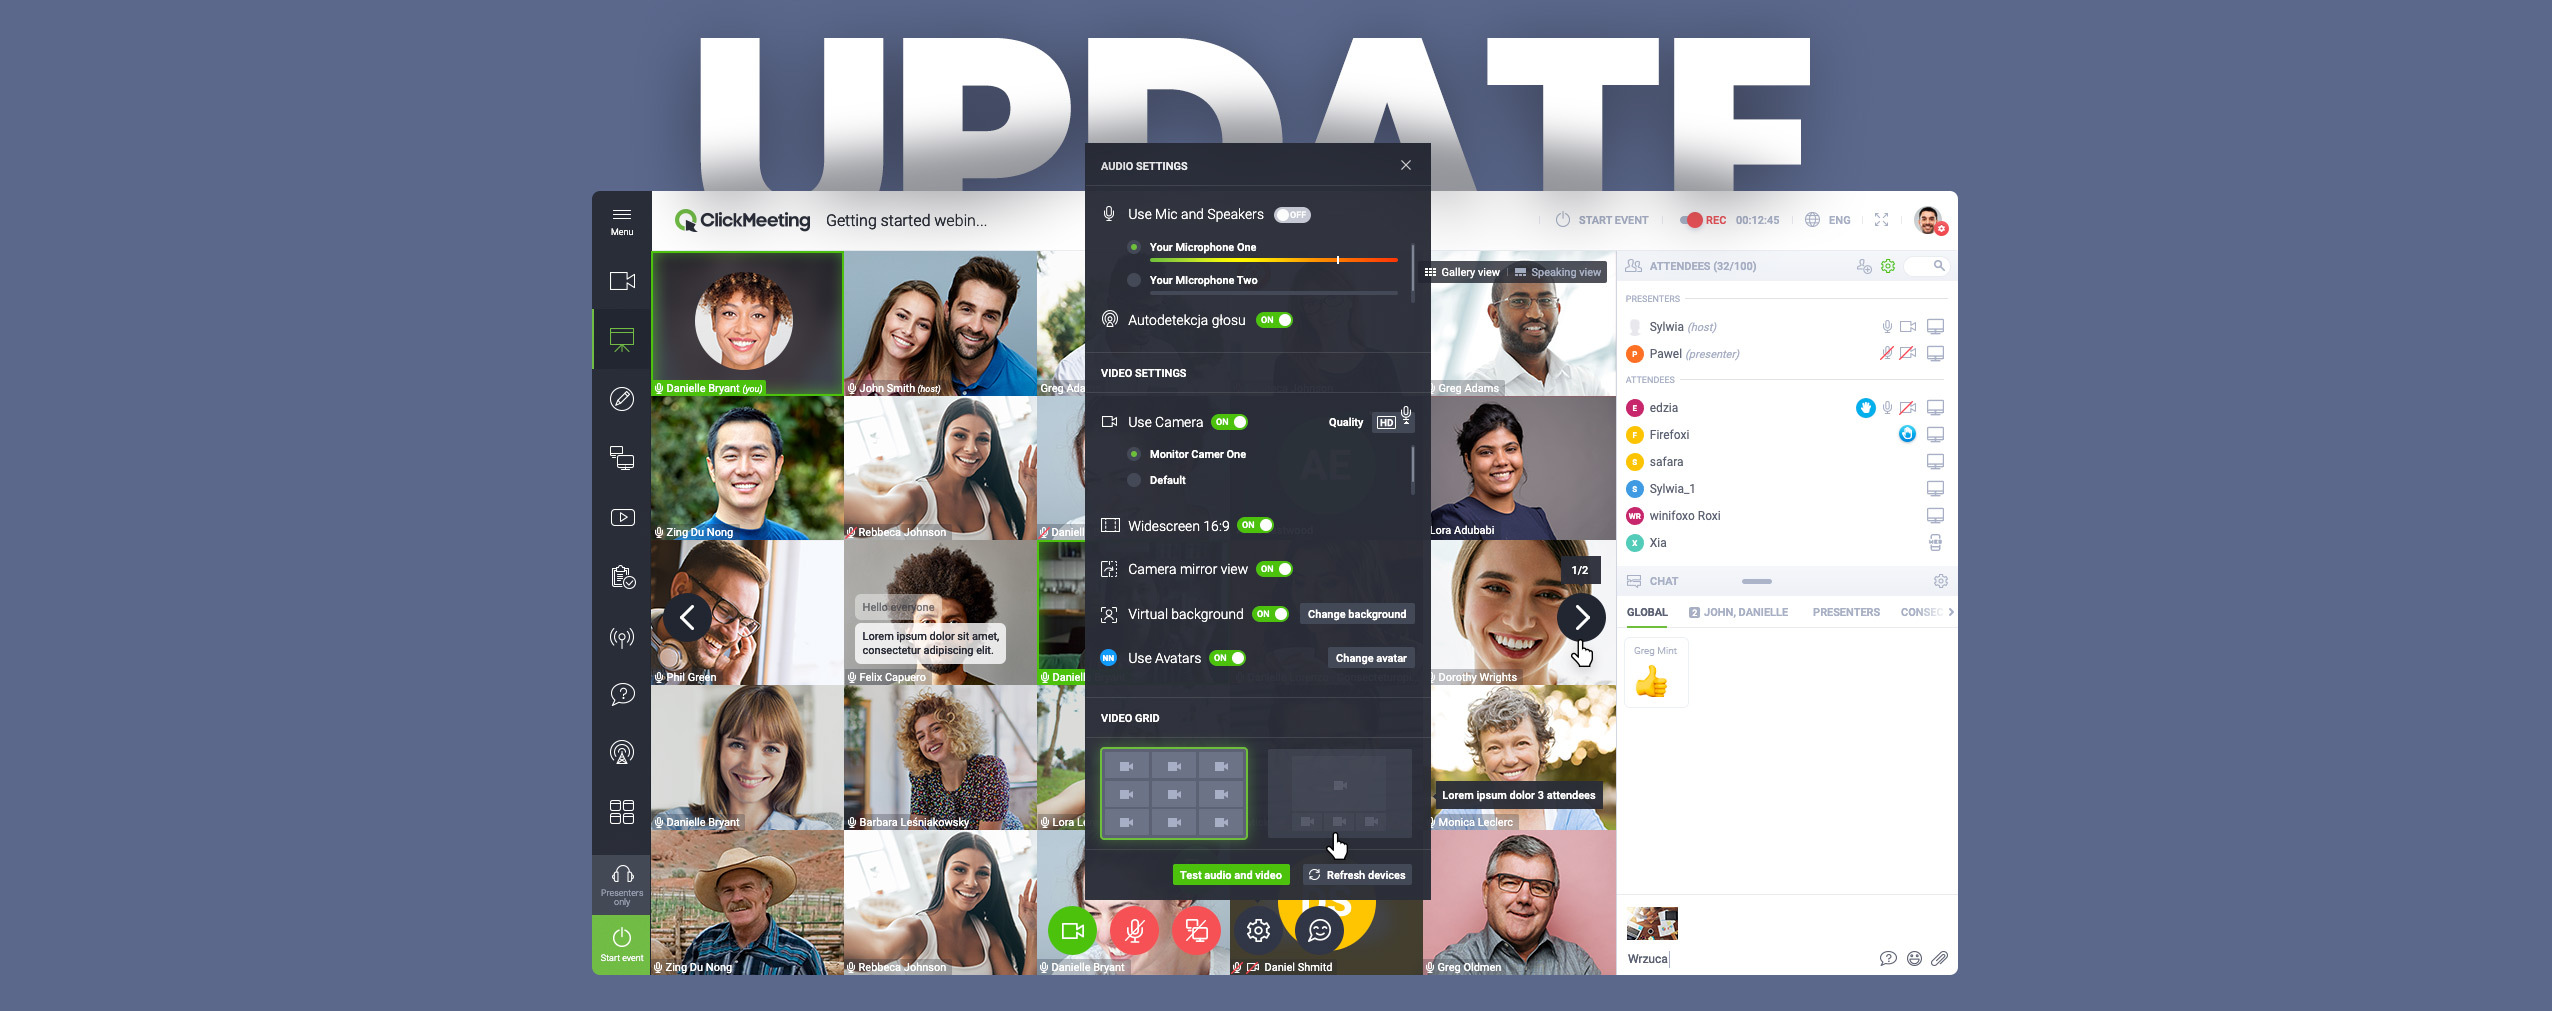
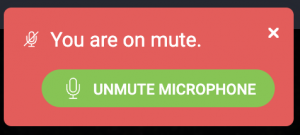
Microphone off indication
Have you ever spoken up at an online event, but instead of receiving feedback, all you heard were reminders to turn your microphone on? Or maybe this uncomfortable situation happened to one of your event participants? It’s an entirely explainable situation. Muting your microphone when you’re not speaking is one of the basics of virtual Savoir-Vivre and helps avoid unwanted distractions. At the same time, it’s easy to forget this detail when you already want to speak up. With our new feature, you won’t have to worry about it! When you start speaking with the microphone muted, a notification will automatically remind you to turn it on. No one – except you – will notice.
16:9 aspect ratio
Another new feature of ClickMeeting is the 16:9 aspect ratio, which allows you and your participants to enjoy higher resolution and wide-angle view. It’s also easier to capture two presenters or a larger part of the studio. This feature will also be appreciated by users who have an external camera.
The 16:9 aspect ratio will be set by default for all created events. If you wish to revert to 4:3 format, you can easily do so in your account settings.

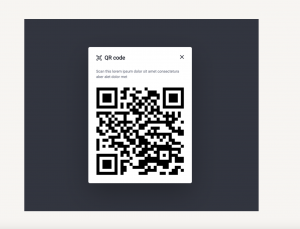
QR code: continue the session on your mobile device
It happens that a user who has started participating in an event e.g. on a computer wants to continue the session on a mobile device. Thanks to the QR code, he will be able to do this without having to log in again. Simply generate the code in the event window and then scan it with e.g. a smartphone.
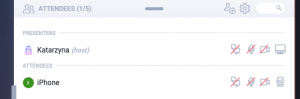
Stopping screen sharing and assigning rights
Managing screen sharing from a presenter and organizer perspective becomes even easier. Simply click the appropriate icon next to the user’s name in the attendees’ list to stop sharing. During meetings, you can switch off screen sharing for a specific person at any time – for example, if your attendee forgot to turn off screen sharing and walked away from the device. At the same time, you will not revoke their desktop sharing privileges. In the case of webinars, you can decide about desktop sharing permissions in the attendee details panel. During these events, you are the one to choose who can share screen, audio, and video. Of course, you can still stop the airing of any of these streams at any time.
Share your experience with us
We are confident that the latest ClickMeeting features will make your work easier and save you time. Feel free to share your feedback on the new solutions. The voice of our customers and event attendees is extremely important to us. And thanks to you, the platform continues to grow. New features are coming soon!