
The top ten new features recently introduced in ClickMeeting – this is what our expert, Jan Meissner, talked about during the webinar. We explain what you can use to interact with webinar attendees, streamline corporate meetings and ensure better learner focus during online classes.
Below you’ll find the full video of the webinar, as well as an article where we discuss the top 10 new tools.
All the new features introduced on the ClickMeeting platform are enhancements requested by our users. Check out which of the following tools will be helpful in your work.
Table of Contents
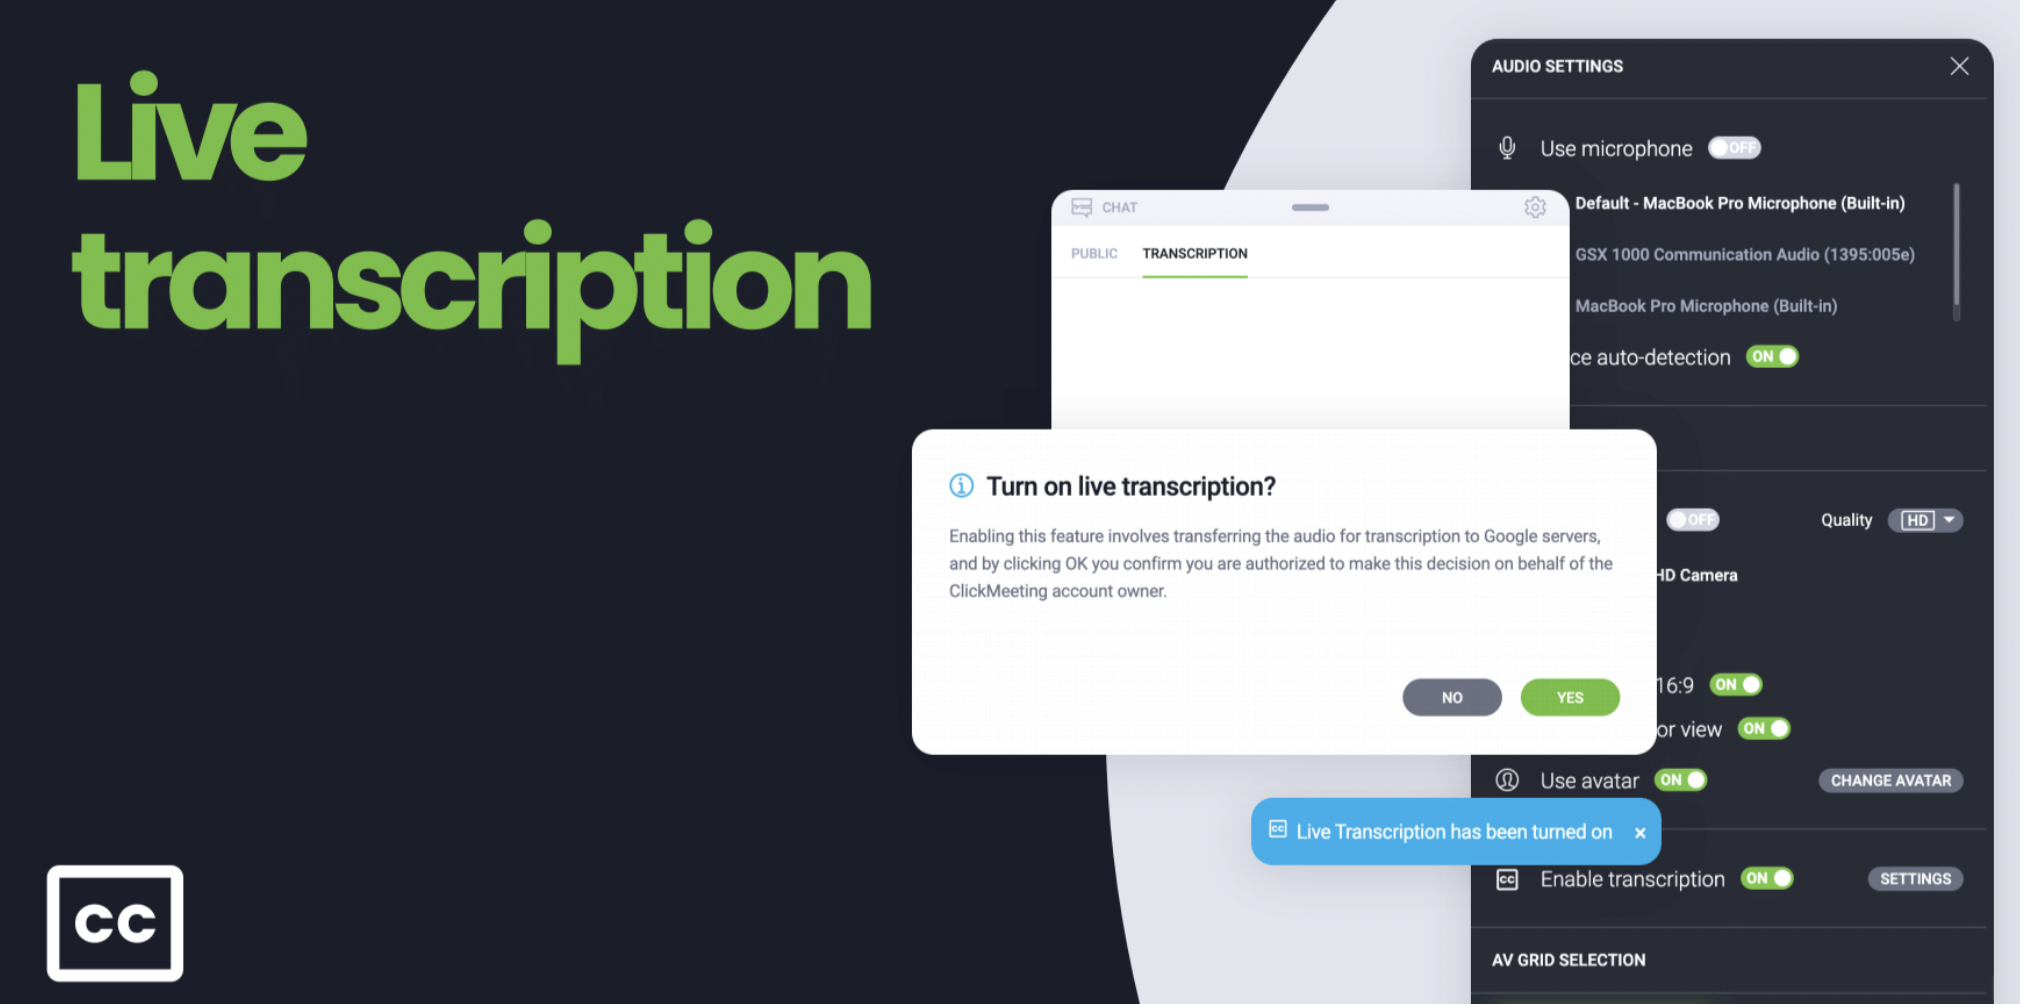
1. Live transcription
Who is it for? 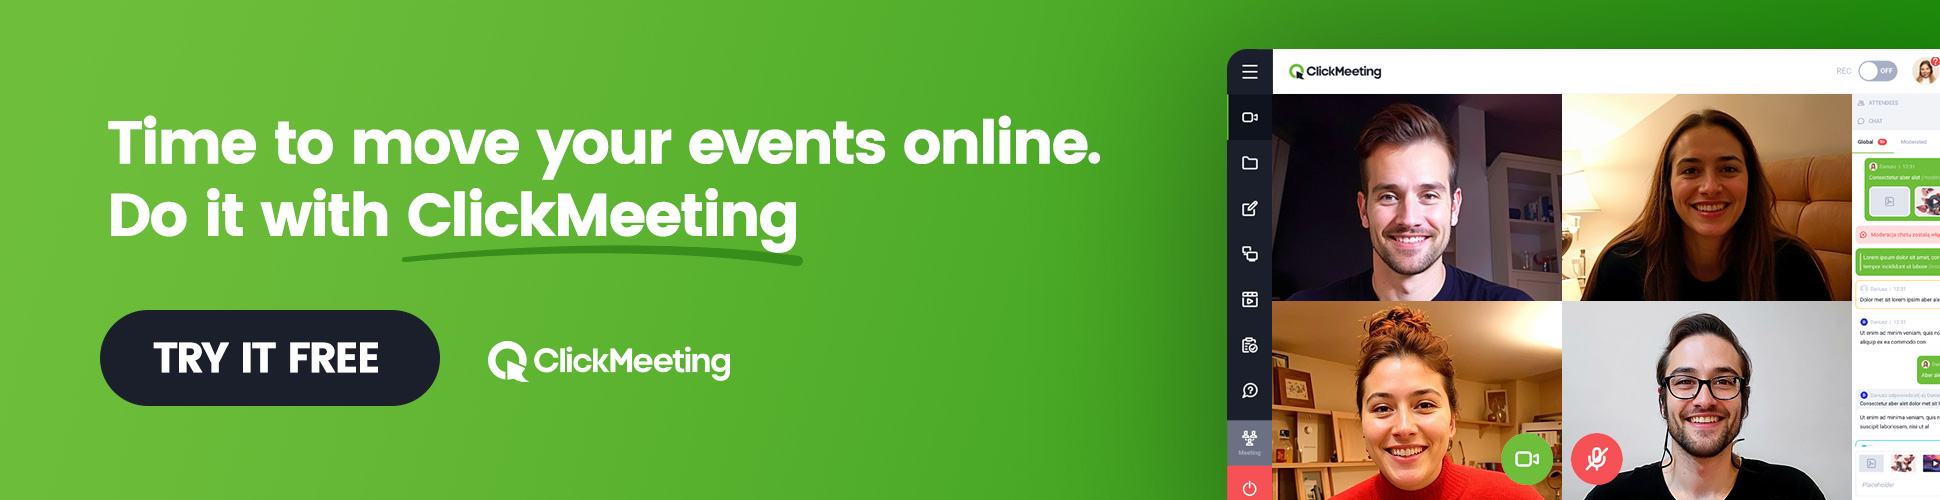
If you are conducting a webinar or meeting that will be attended by hearing-impaired people, it is worth keeping this feature in mind.
Also, enable transcription during the event if you want to use the content in other ways, such as a blog article.
How it works?
Live transcription converts the presenter’s speech into the written form displayed on the presentation.
In addition, there is a special tab in the chat where the entire speech is transcribed. The text after the event can be processed and used to transcribe a report, improve an existing presentation, create a blog post, etc.
What is worth remembering?
Transcription does not start automatically. If you want to use this feature, you need to remember to turn it on, for example, just before you start your presentation.
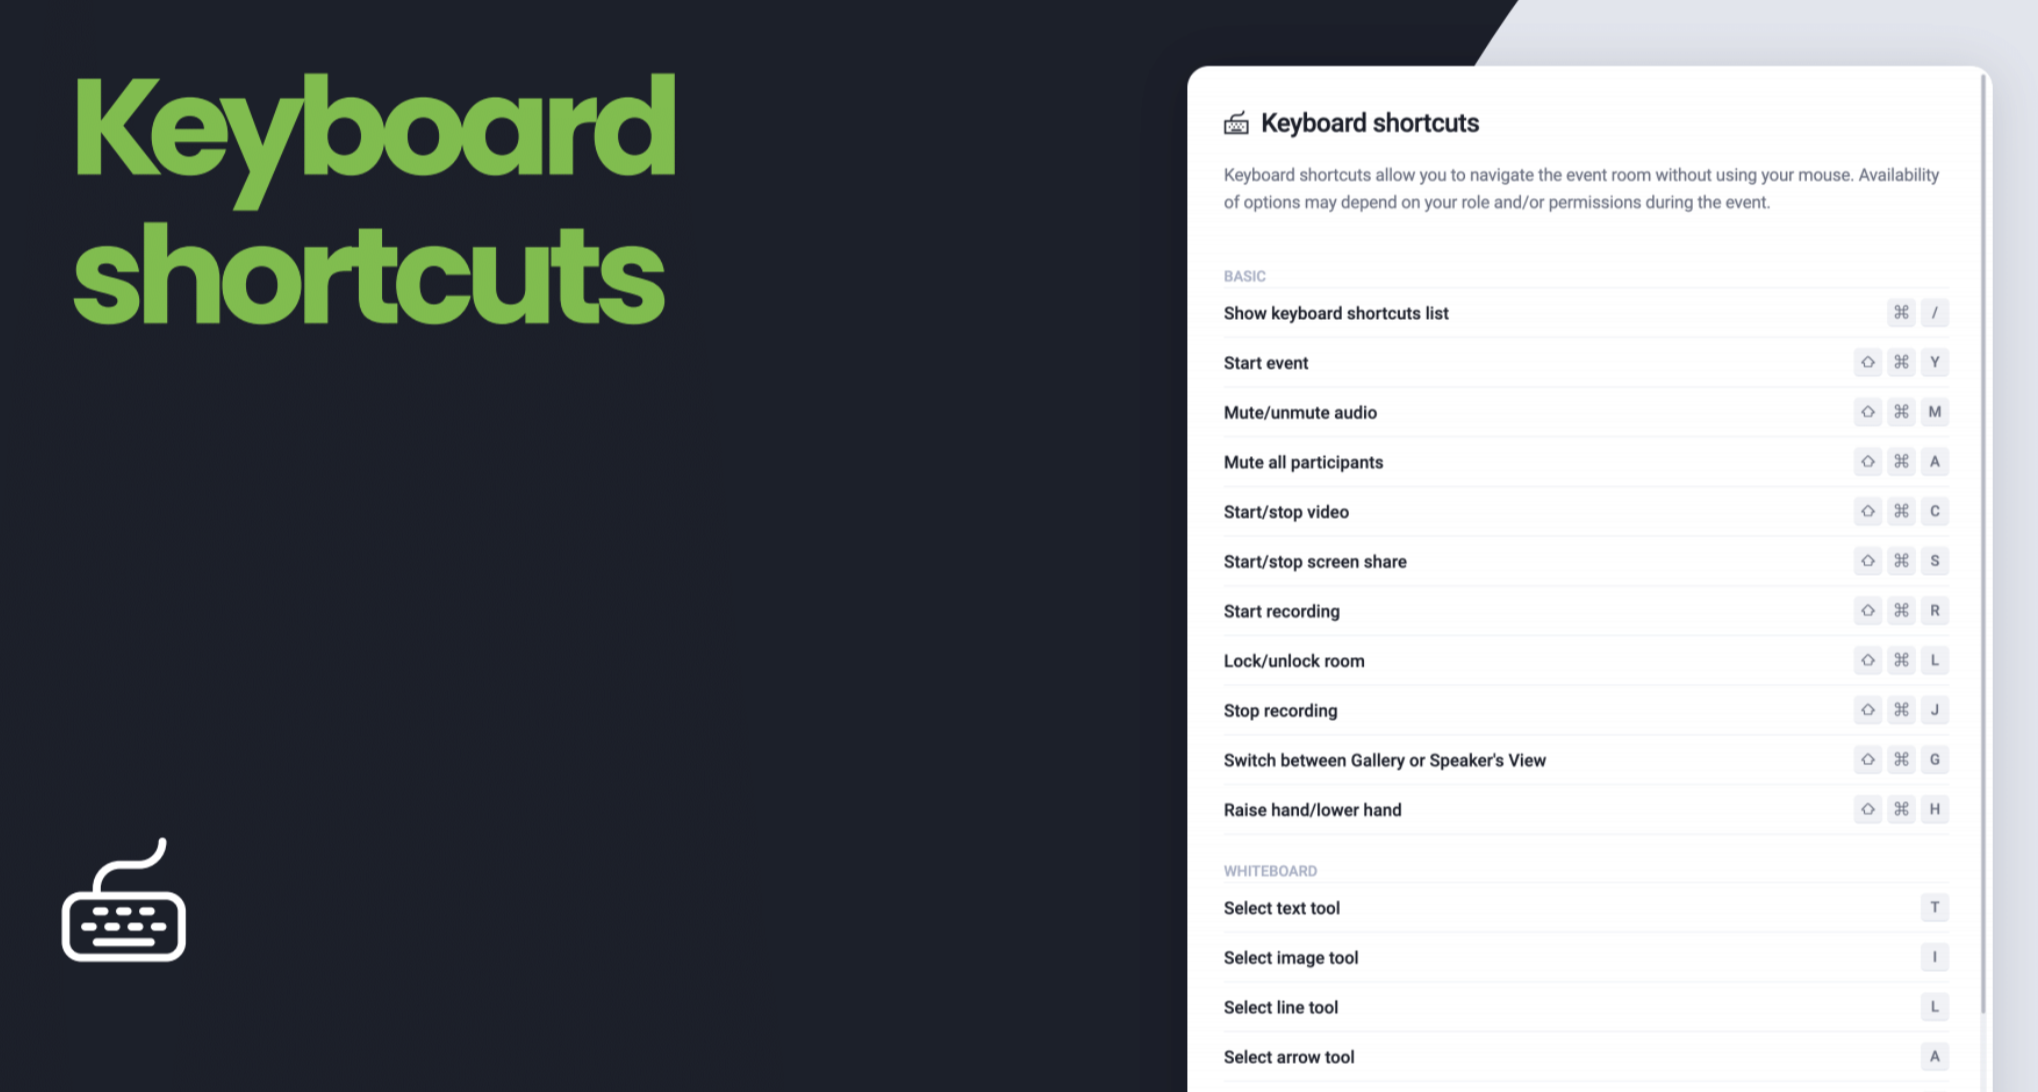
2. Keyboard shortcuts
Who is it for?
For a webinar presenter, for a meeting leader or for a teacher during a lesson.
Important tips
The keyboard shortcuts do not need to be learned by heart. They are available in the upper right corner in the event panel.
Examples:
Start event,
Mute/enable microphone,
Mute everyone,
Turn on/off camera,
Start recording,
Raise/lower hand,
When using Blackboard: insert image or line or arrow.
When are they useful?
When you want to save time and not look for a specific button in the webinar room. But also in situations when you need a quick response – such as a dog barking at an important business meeting or a neighbor drilling into the wall during a webinar.
Functions for communication with attendees
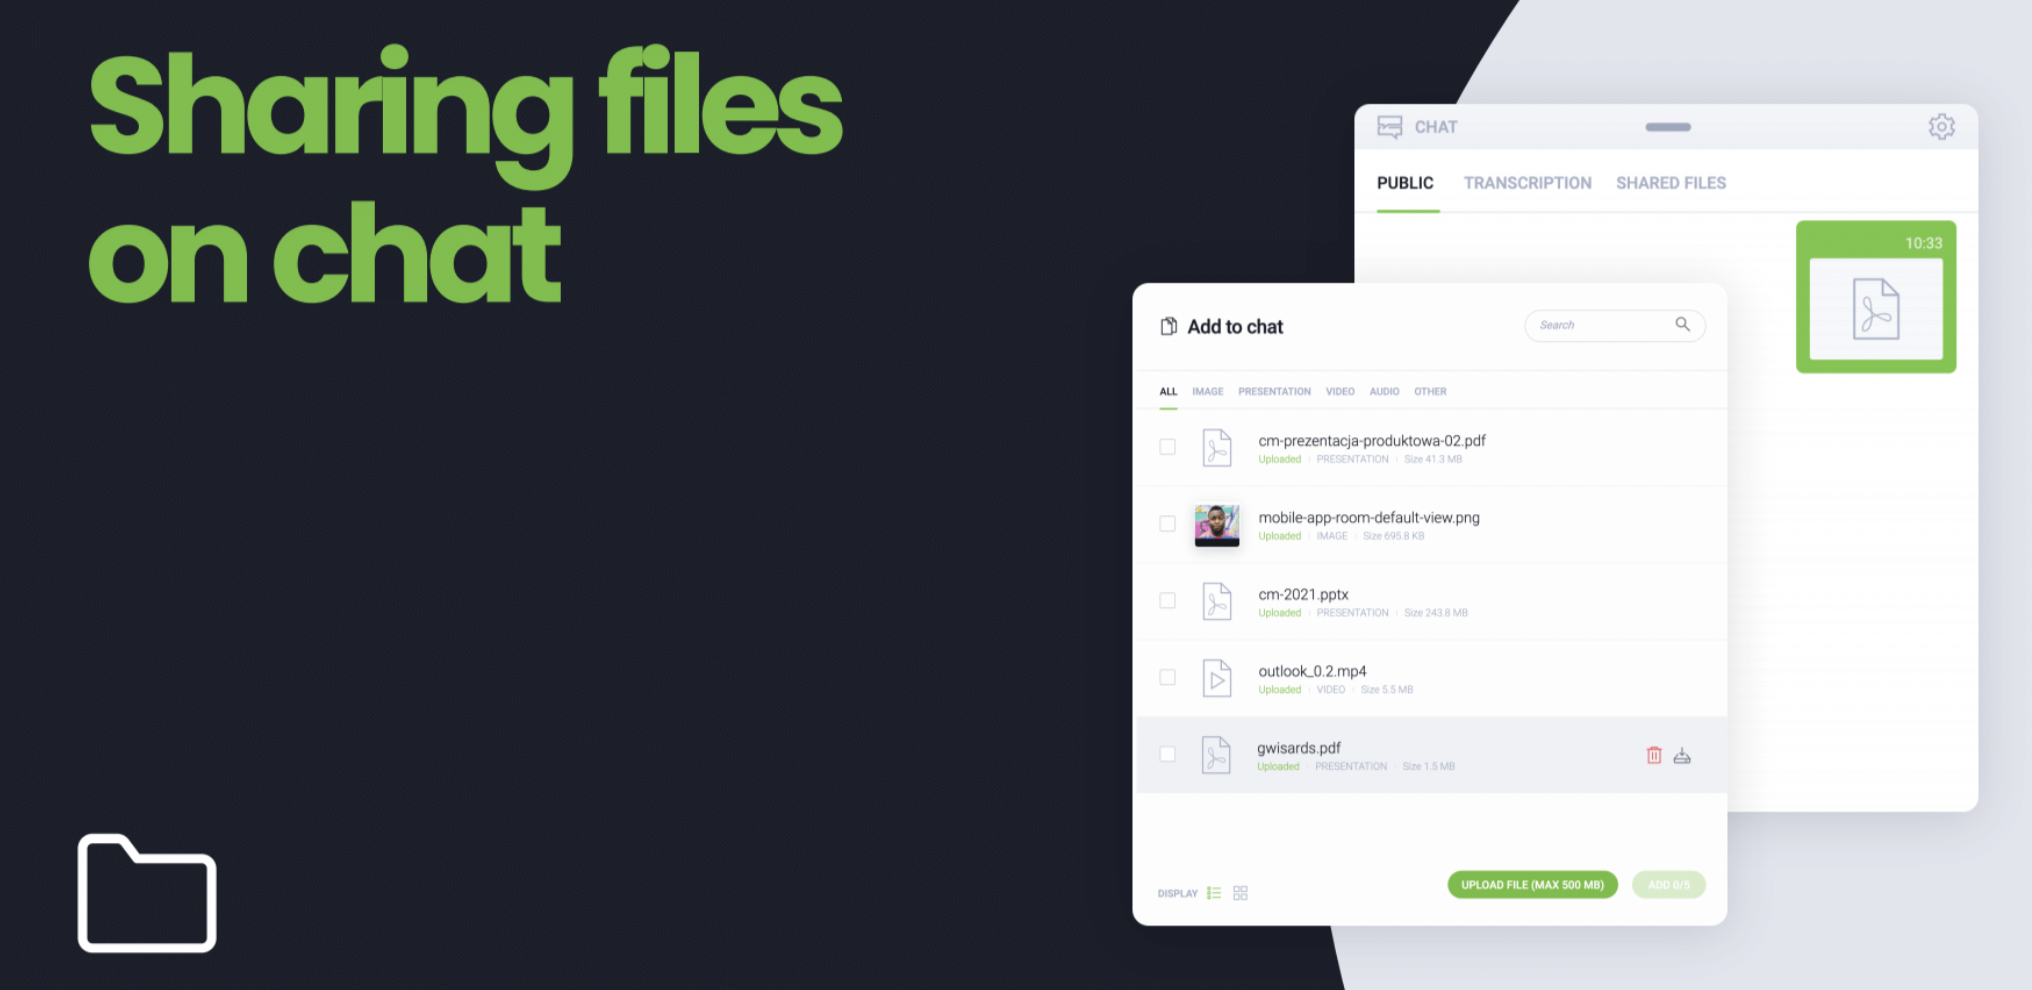
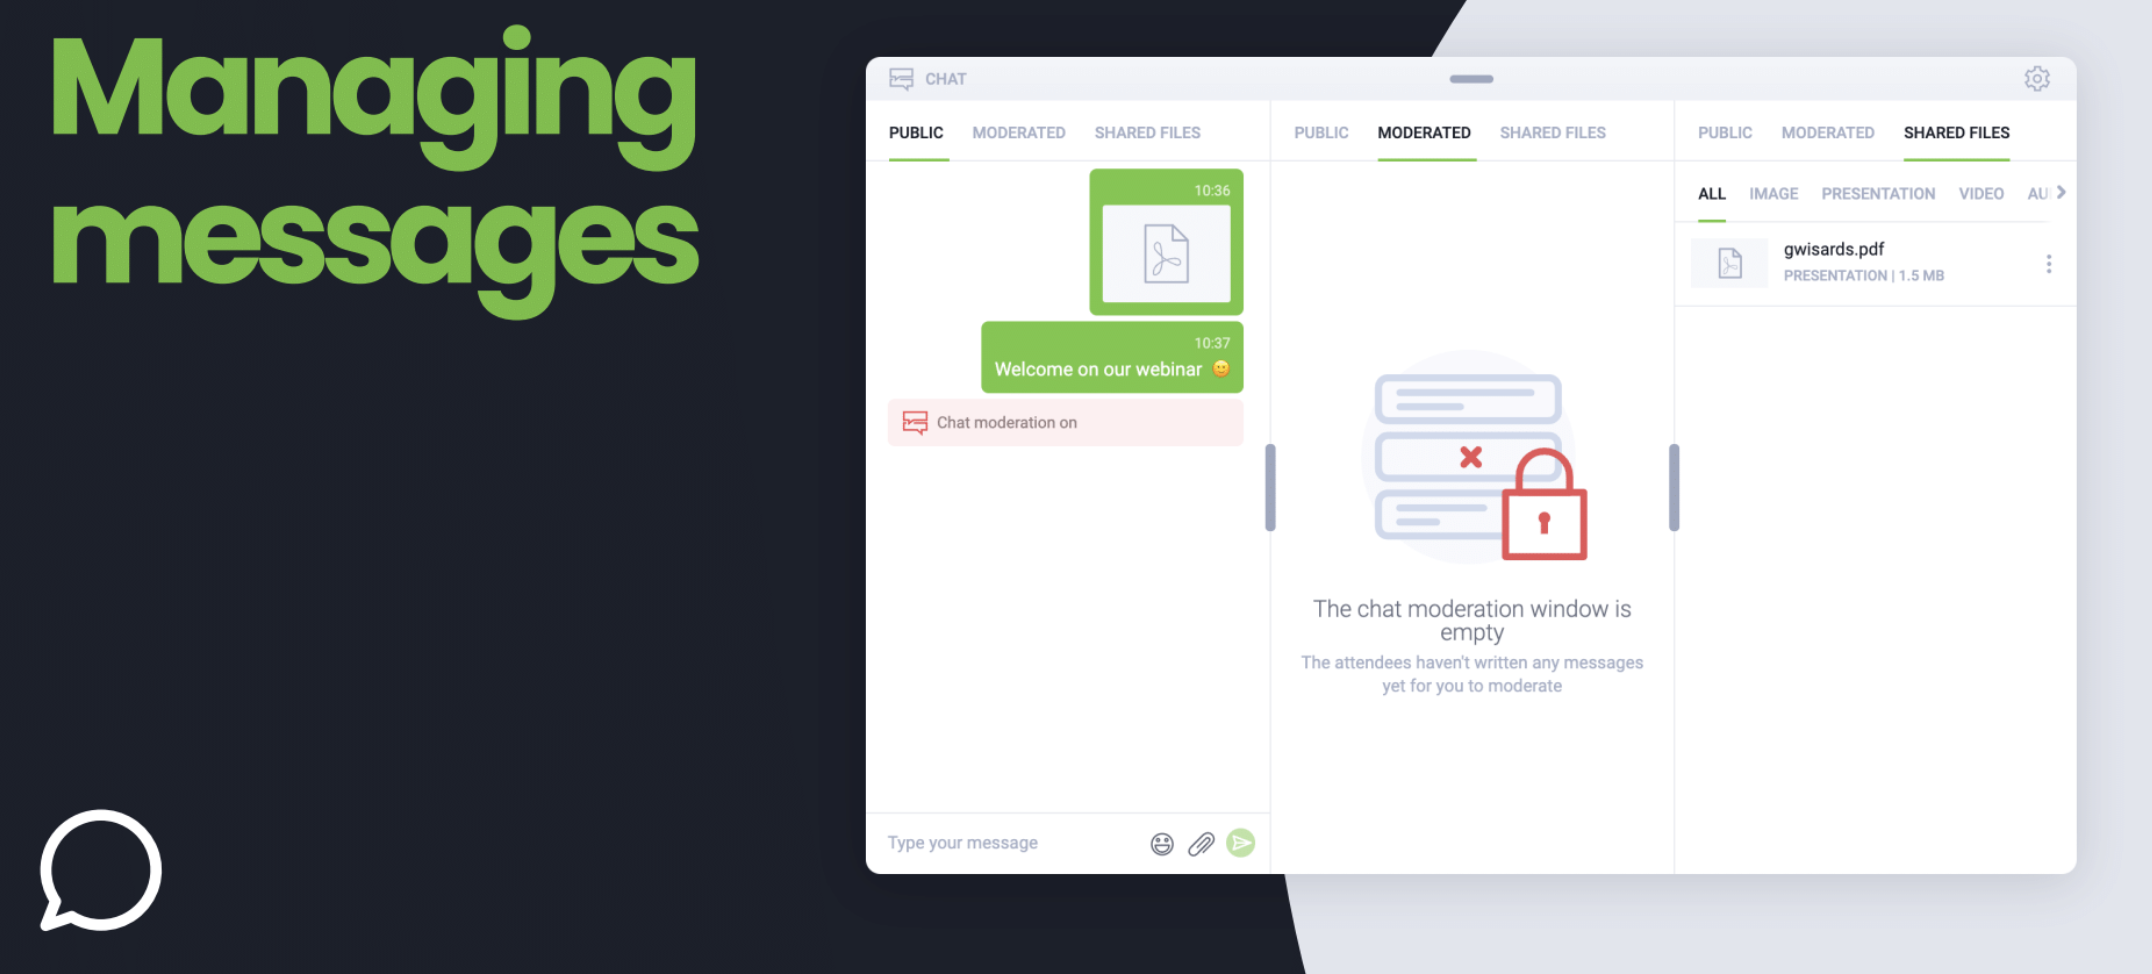
3. File transfer in the chat window
How it works?
During the meeting/training/class, you can upload files in the chat window. They will be available in an additional tab for all attendees. Available and ready to download.
Who is it for?
For all presenters who want to gain a more attractive form of communication and interaction with attendees.
For lecturers/teachers/trainers who wish to send their students exercises to complete in this way.
3.2 Message management
Why to use?
To streamline communication and improve chat transparency.
How?
By replying to specific messages that appear in the chat. This way, the person asking the question doesn’t have to browse through the entire chat to see if an answer has been given. By choosing to respond to specific messages, you make it easier for listeners to focus on the content of the webinar.
In addition, you can pin some message at the top of the chat, so that any attendee who wants to ask the standard question “will there be a recording?” will find the information, for example: “the recording will be sent up to 48 hours after the event”.
With this feature, the person moderating the chat or the presenter will avoid answering repeated question about the recording during the event.
3. 3 Live emoji
Who can use it?
Any person who has a microphone and camera on. The reaction to a given statement appears in the AV window of the person selecting the emoji.
When is it useful?
During meetings when more people have microphones and cameras on, and a conversation is being held. With this feature, you can shorten the distance, show the speaker that you agree with them, and express your emotions about the topic.

4 Attendee limits and their view
4.1 New limits on the number of meeting attendees
The information is especially important for the education sector – teachers, lecturers, trainers who run meetings for a larger number of people. This is also a valuable feature for teams working remotely or hybrid, and with more than 25 attendees, because until now 25 was the upper limit in terms of the number of attendees during a meeting.
What is the limit and what is important?
The new limit on the number of online meeting attendees is 40, and all of them can have cameras and microphones on.
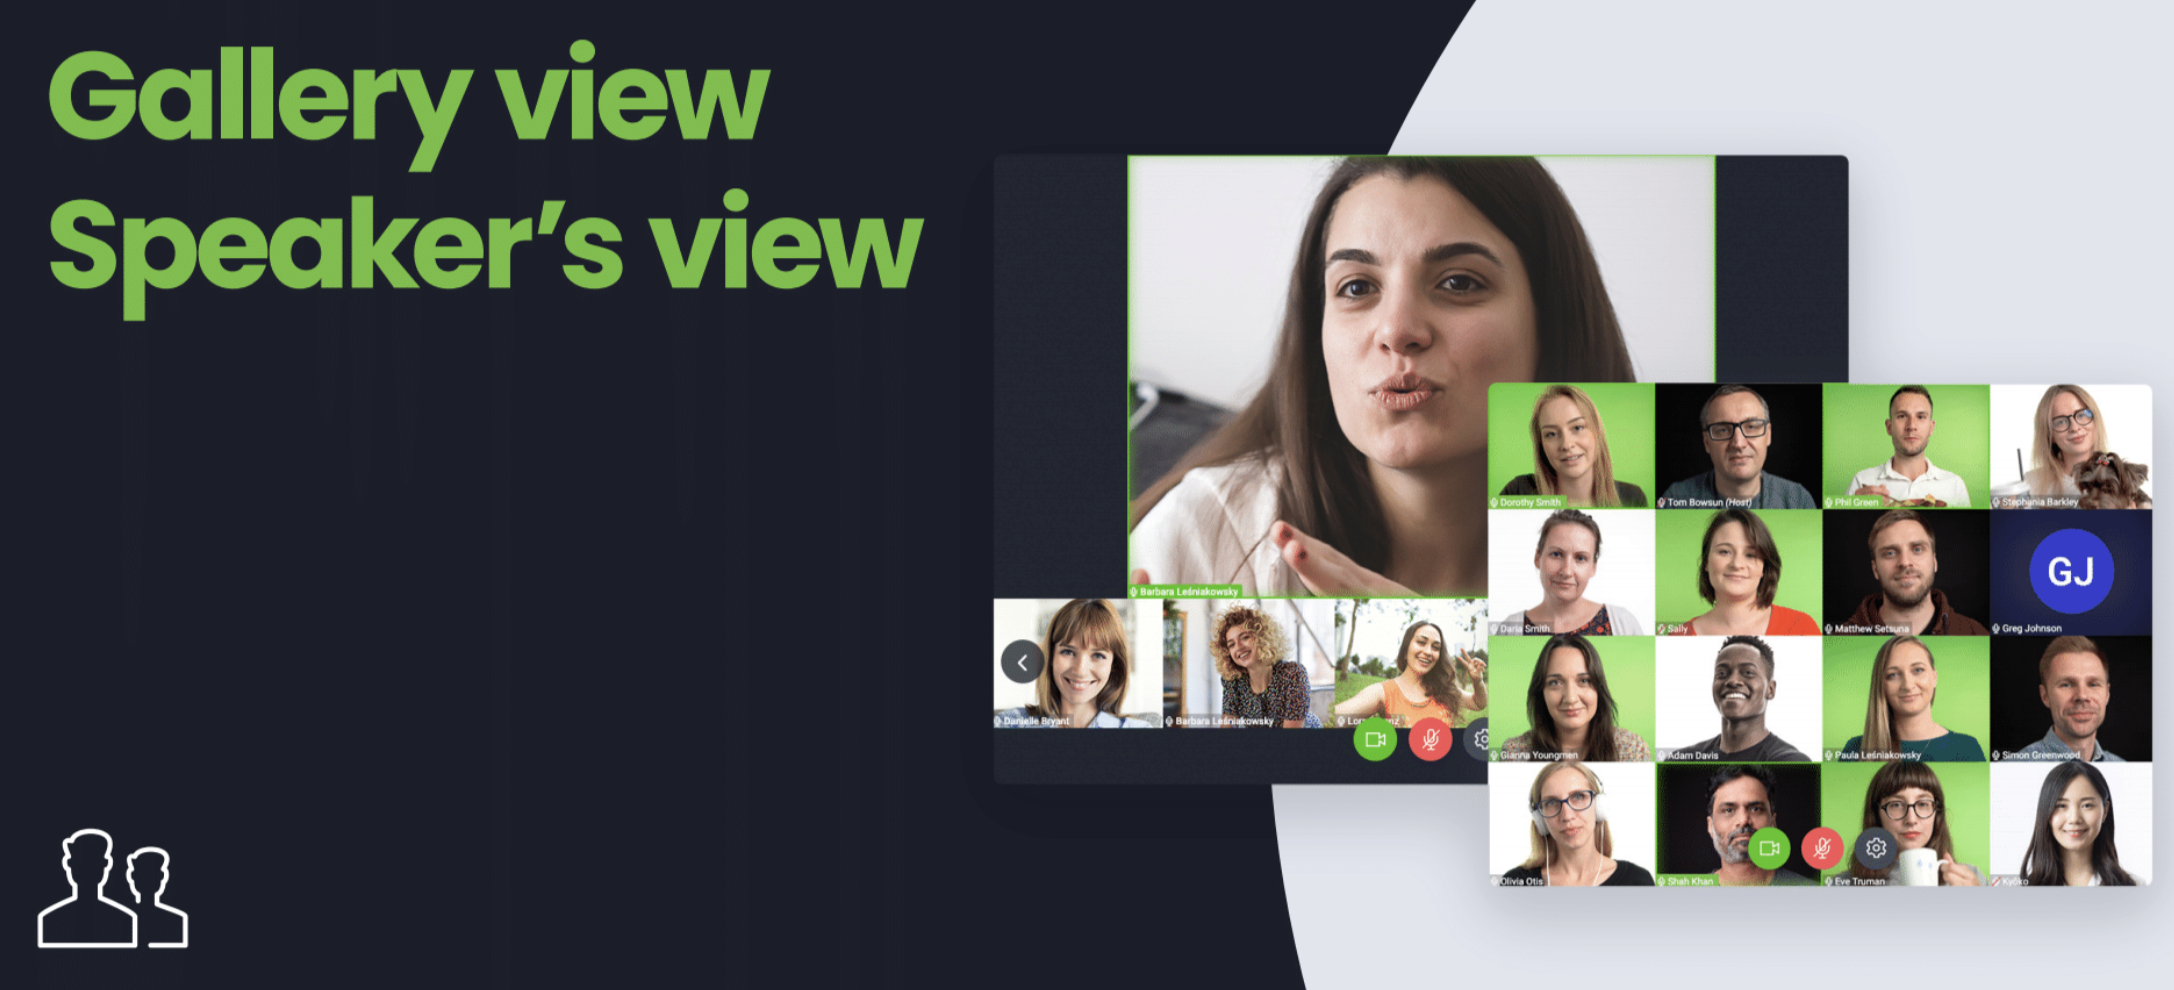
4.2 Gallery view or speaker’s view
While increasing the number of online meeting attendees, we also thought of the possibility of setting up a gallery view of AV windows. This way, each meeting attendee has an image of the others in front of him in equally sized AV windows.
You can easily change this view by switching the option in the audio-video settings panel to the speaker’s view. You don’t need to do anything additionally because the automated voice detector will determine and enlarge the window of the person who is currently speaking after a few seconds by itself.
5. Desktop Application
Until recently, ClickMeeting was only available in a browser. Currently, you can also use the desktop app that you install on your computer.
Who is it for?
For example, for people who, as a presenter, trainer, or attendee, frequently use webinar rooms. Remembering which invitation contains a link to a particular room is no longer a problem. In the desktop application, all permanently open rooms for specific meetings of different teams can be saved in the favorites list and entered there without typing the link in the browser.
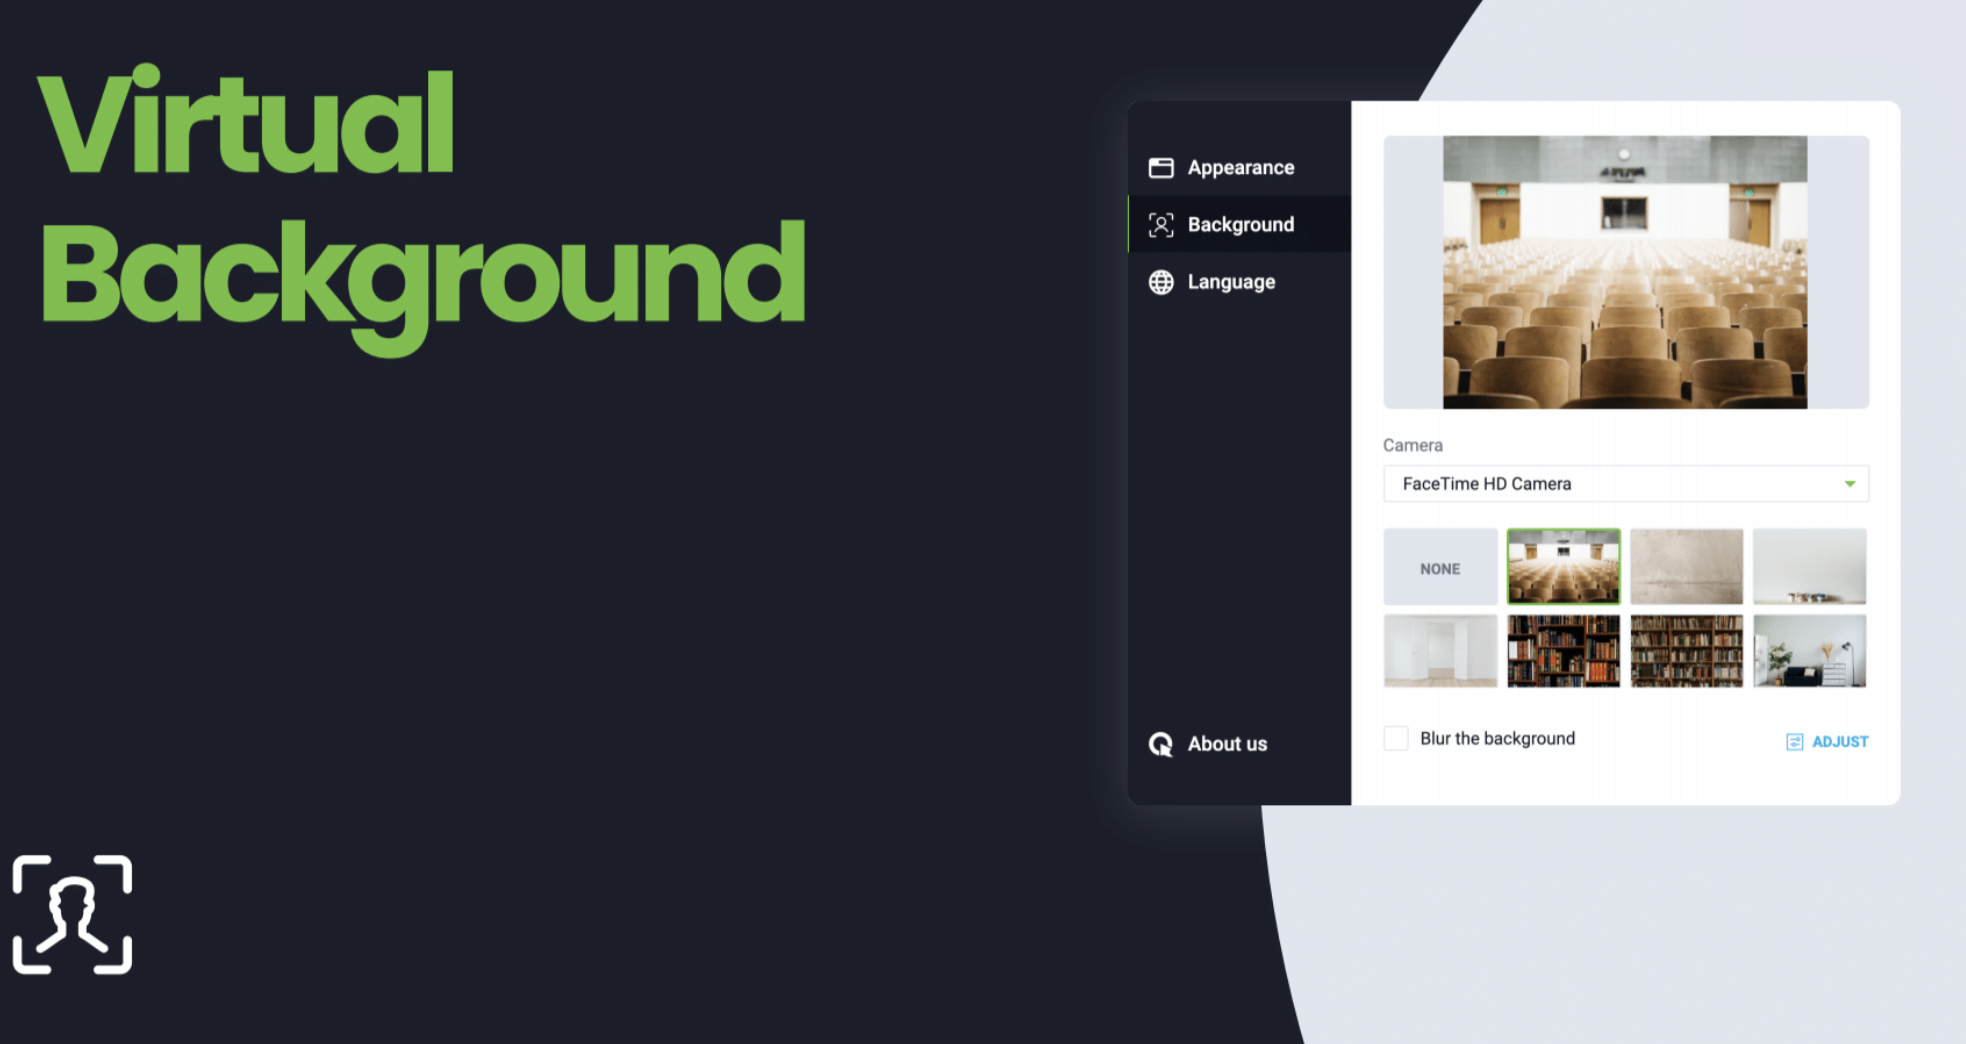
5.1 Virtual background
In the desktop application you will find a feature that often comes to the rescue during online meetings.
Who is it for?
For people who join meetings from different locations and can’t always provide a proper background. For those who haven’t taken their time to clean up their office/home surroundings and wouldn’t want to share the view of the mess. For parents of young children who happen to sneak behind during online meetings.
How it works?
You can set as a background one of several graphics offered in the desktop application. Another option is to upload your own background file. If, for example, the presenter cares to have a logo or company name in the background, or a specific color scheme in line with the company’s colors. You can also use the blurred background option in this feature.
5.2 Invoke desktop application
A feature that allows you to choose how you want to participate in a meeting each time. Specifically, ClickMeeting asks the person who clicks on the invitation whether they want to join the meeting from the browser or through the desktop application.
6. QR code
What does it provide?
Greater flexibility. It is no longer necessary to use a computer or laptop for online meetings, and the code helps you to quickly navigate to the event from a mobile device.
When can it be useful?
Let’s say you’re in the middle of an important meeting that’s getting extended. You already have to leave your home or office because you’re in a hurry to catch the bus, but you don’t want to miss anything from the meeting or waste time typing in the meeting link on your mobile device. All you need to do then is scan the QR code available at the top right corner of the event panel.
7. Attendee management
Who is it for?
For the meeting organizer, for presenters during webinars. The function easily allows the presenter to grant or revoke attendee privileges. For example, it could include turning on the microphone or muting it, turning on the camera, and sharing the screen. Then all attendees can follow what the participant is presenting on their screen.
8. Features in the view area
8.1 View synchronization
Why use it?
To give the presenter a greater sense of control.
How it works?
By default, any attendee can unpin the presenter’s AV window and move it to any location. Each attendee can also, for example, enlarge the chat view for themselves. However, if the presenter is particularly keen that all attendees have the same view, they can enable view synchronization.
When can it be useful?
Imagine a situation where a meeting organizer meticulously prepares a presentation. Perhaps it is an important training session, after which attendees will take a test. The distribution of the material is therefore very important, so each attendee should have the same chances to get acquainted with it. By enabling the synchronization option, the instructor will ensure that students do not cloud their view of the relevant data.
8.2 16:9 format.
Why to use it?
To make the image quality better and to make the presenters well and clearly visible.
This is currently the highest standard for showing camera images. With a wider angle.
8.3 Mirror view
When can it be useful?
Before and during the webinar to check that everything is going according to plan and presents itself in a natural way.
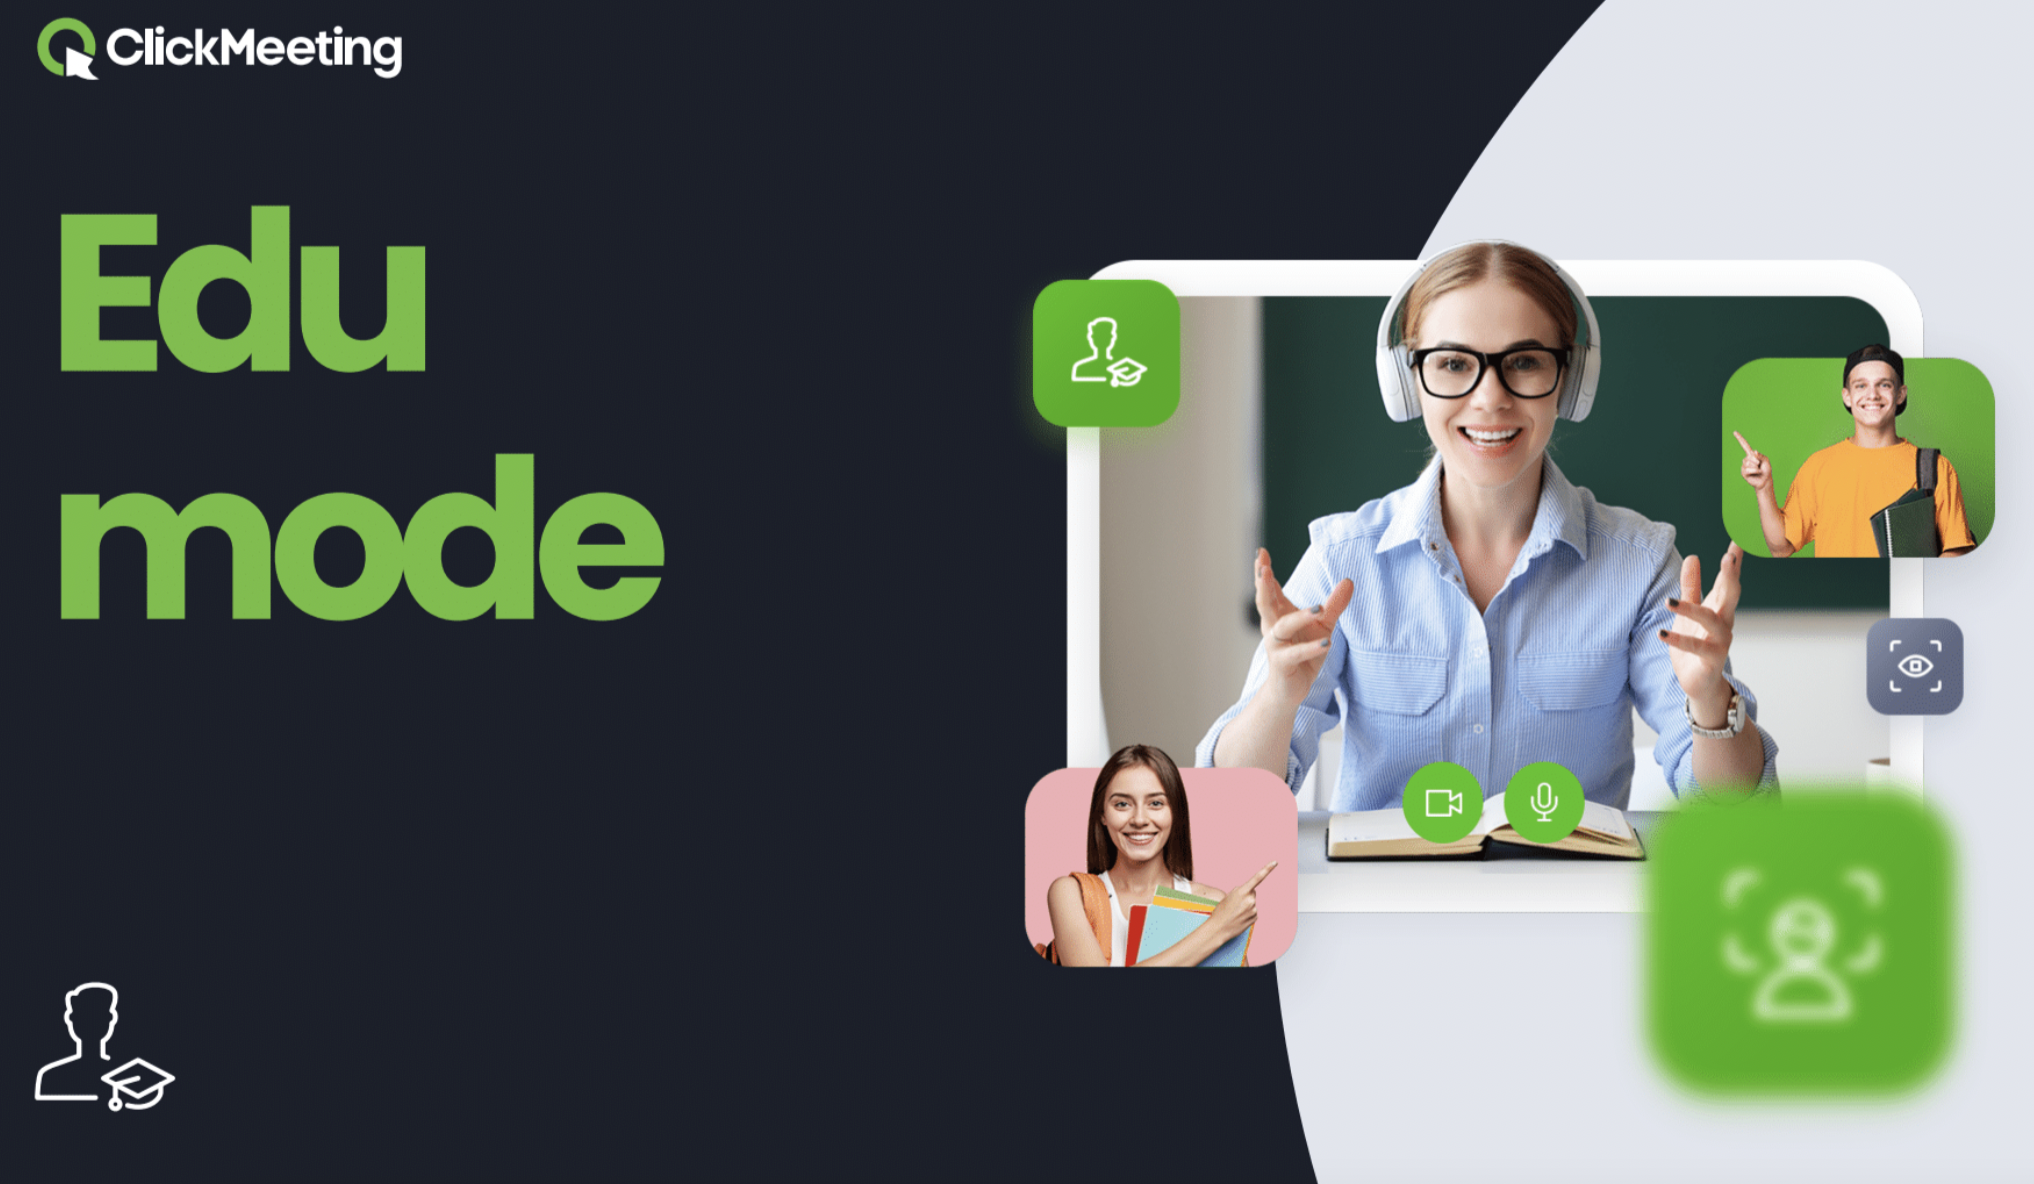
9. Edu Mode
How does it work?
This is a feature that allows the presenter to see all attendees, while attendees see only the presenters.
Why it’s important?
It makes the students or learners more focused. They concentrate on the material and not on the appearance of the other students.
10. New add-ons menu
Two features have appeared in the drop-down new add-ons menu: live streaming (an option for professional broadcasting with an external camera and microphone) and individual support services.
What is included in the support services?
- Training with ClickMeeting’s education department,
- Individual technical support during the webinar,
- Account manager support.
Do you have other suggestions for new platform features? Feel free to contact us!
If you are not yet familiar with ClickMeeting, test our platform for free!