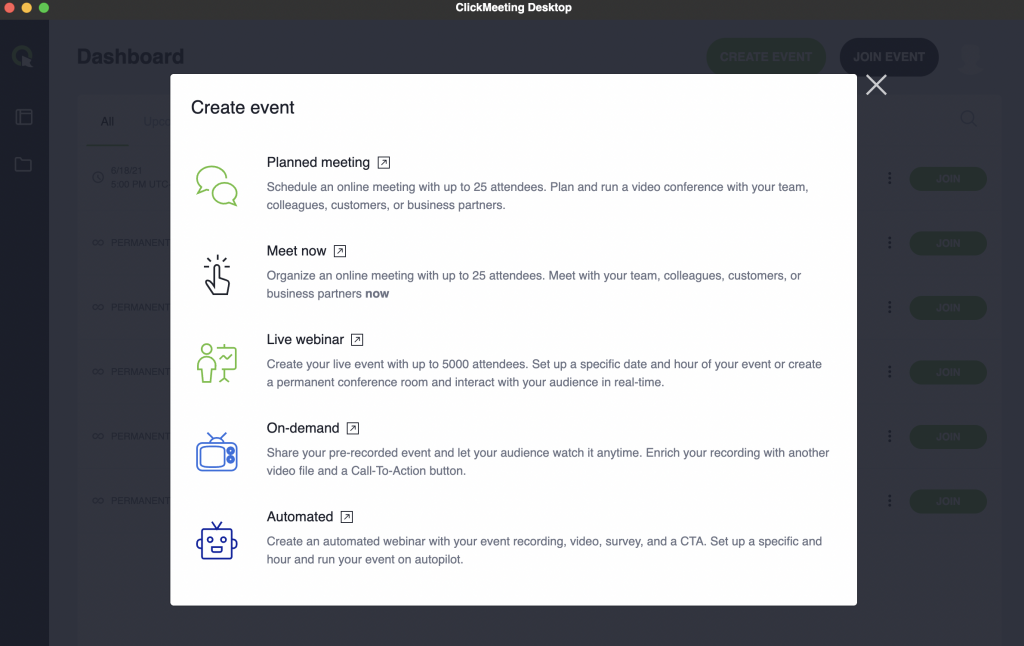
To use ClickMeeting to its full potential, all you need is a browser and a stable Internet connection. However, some users prefer to use a desktop application. It’s possible. With our desktop app, you can securely host and participate in all kinds of events. At the same time, you gain access to all the existing functions of the platform, as well as completely new solutions.
Modern software should, above all, be adjusted to the individual preferences of each user. However, these can differ significantly from one another. Many of us appreciate the tools that do not require the installation of any software on the hard disk. ClickMeeting is well aware of this fact, so we make sure the access to the platform is intuitive and does not force you to leave the tab of your favorite browser.
On the other hand, some users, especially those who host a large number of webinars and online events, prefer to use a separate application. No problem. All you have to do is to download the appropriate file from our server for free. We will show you step by step how to do it and how to use all the options offered by the ClickMeeting desktop app.
Table of Contents
Use ClickMeeting any way you want
ClickMeeting is available wherever you need it. So you can use it:
-
On your computer via your browser – without having to download any software;
-
On a Desktop App – we provide you with software that you can download to your computer;
-
On mobile devices via the ClickMeeting Webinars & Meetings App;
-
On mobile devices via a browser (RWD room).
Desktop app: download and install the ClickMeeting App
The ClickMeeting Desktop App is another way to comfortably and securely use our platform for online events. Through the application, you will be able to both organize meetings and participate in them. The application does not require any configuration on its own. Start by downloading the appropriate file to your computer:
Then all you have to do is to install it on your drive. After a few moments, the ClickMeeting Desktop App is ready to go.
Join as a host or an attendee
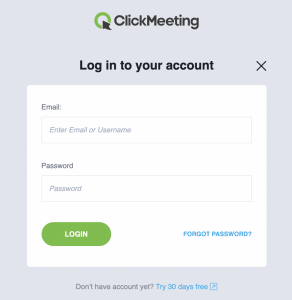
After launching the ClickMeeting Desktop App, choose whether you want to log in as a host or attendee to the event.
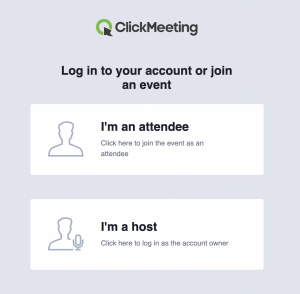
In the first scenario, you need to enter your ClickMeeting account login credentials. At this point, you can also go to a page that allows you to create a free trial account to try out the platform’s capabilities.
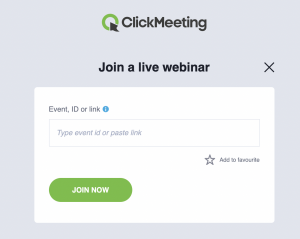
If you want to attend an event as an attendee, select the appropriate option and then enter the event ID or event URL. You will find all the necessary information in the invitation email you received from your host.
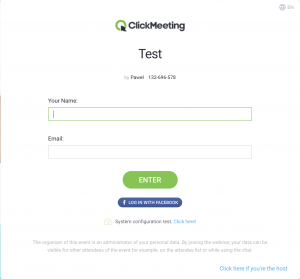
In the next step, just like in the browser version of ClickMeeting, enter your details and join the event.
Logging in to the desktop app as a host
After logging in as a host you will gain access to all the information in your account. You can view your webinars list, delete them, invite attendees, join meetings and create new events (you will then be redirected to the browser version of your account). By selecting the relevant icon on the left-hand side of the panel you can also manage your files. You can easily add presentations, recordings, videos, and other content to make your event more impressive.
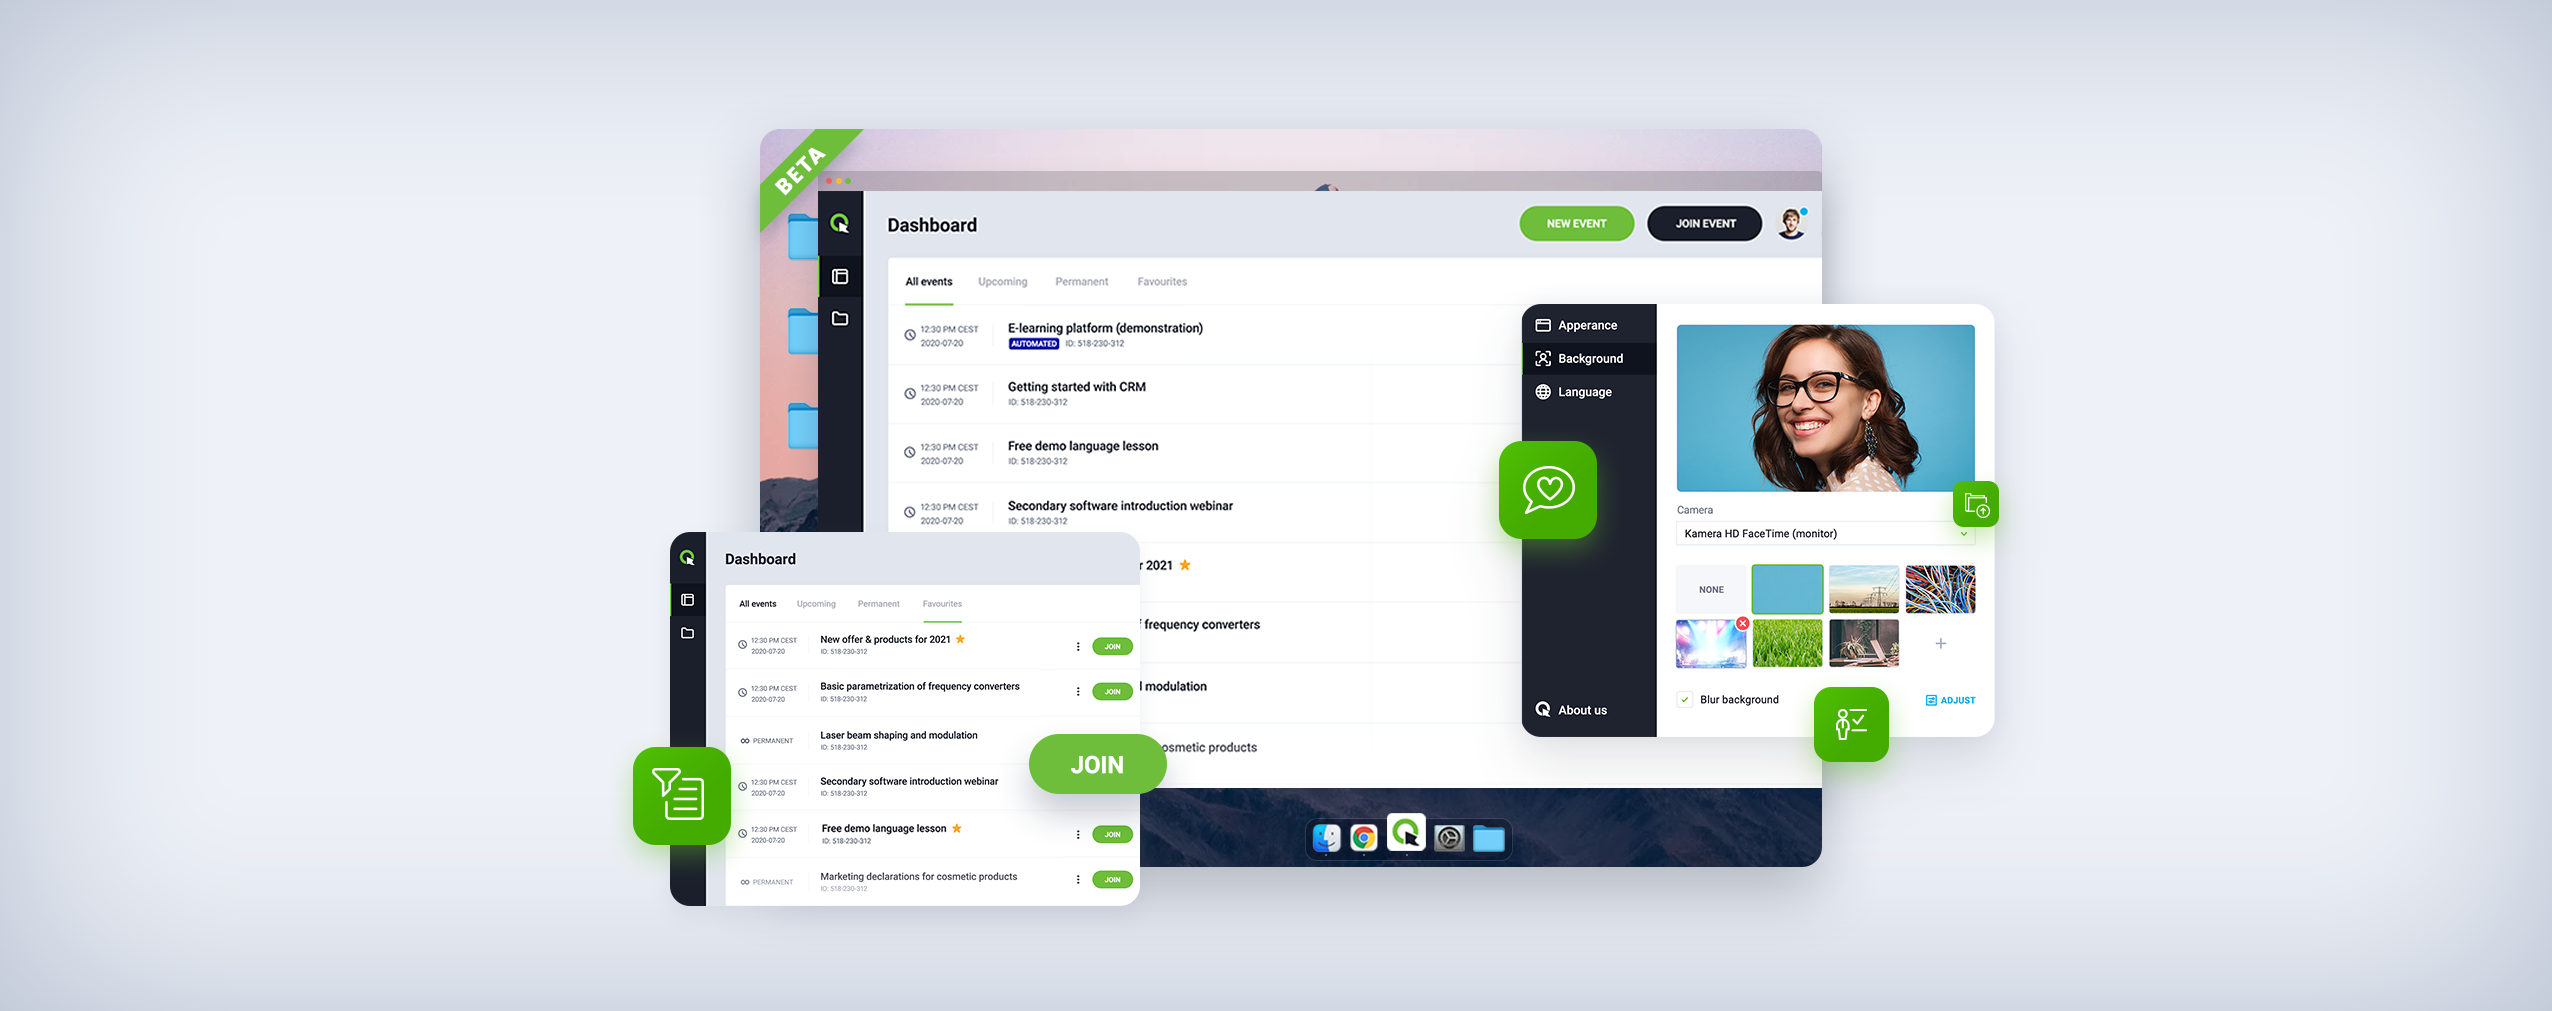
Event Room in the Desktop App
Event rooms are at the heart of the ClickMeeting Desktop App. They allow you to conveniently manage your conferences, as well as participate in them as an attendee.
To access your event, simply select the Join button.

This will take you to a room you are very familiar with from the browser version of ClickMeeting. You can then test audio and video, start your event right away, or get busy preparing it while waiting for attendees.
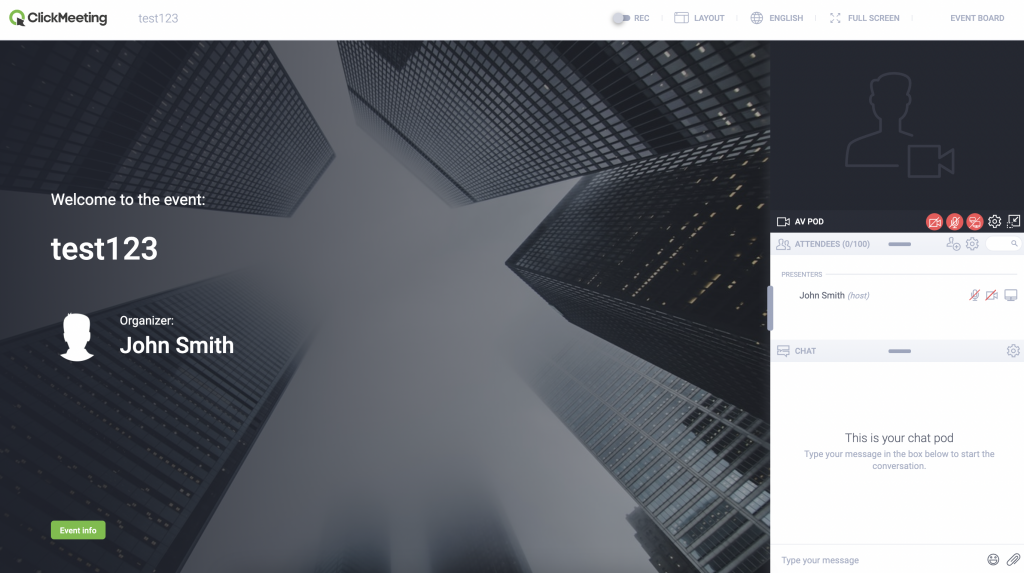
As you can see, the view of the event room has not changed. Here you can also conveniently manage your event and the content that will be available during it. At your disposal are, among others:
- Adding presentations,
- Managing files,
- Using the whiteboard,
- Screen sharing,
- Posting YouTube videos,
- Creating polls,
- Managing Q&A sessions,
- Creating Call-to-Action buttons,
- Managing breakout rooms,
- Streaming the event on Facebook or YouTube.
Once everything is ready, launch your event and meet your attendees.
Go for virtual background in your desktop app
Our goal is to deliver the tool that will allow you to take full control over your webinars and online meetings. At the same time, we do realize that not everything can be predicted, and what happens behind the presenter’s back can be especially troublesome. ClickMeeting lets you quickly eliminate this risk, so you can run your events without worrying that the attendees would witness unexpected situations. Just like in the case of our Dr. Webinar:
With a few clicks, you will be able to apply a virtual background that makes a great addition to your workspace. You can choose from a variety of suggested images or blur the background. Your attendees can then concentrate directly on the content, and you don’t have to worry about anything interfering with the reception of the event.
As a host you can set the virtual background in two ways:
- In the main panel, select the user icon and then go to the settings tab.
- In the background section, you can select one of the available images or choose to blur. So, you can quickly move to a virtual library or lecture hall, for example, or simply blur the image behind you.
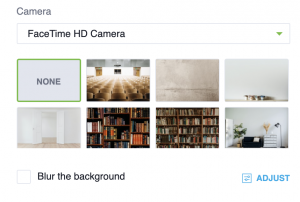
Changing the background is also available directly from the event room. Simply select the settings icon below the AV window and enable the virtual background option. This way, you can also quickly and easily change the background during an event.
Smart screen sharing within the app
Sharing your screen with your attendees is also much easier with the desktop app. You can choose from two ways of sharing:
- Sharing the entire screen will enable you to broadcast in real-time everything that is happening on your screen. For example, you can freely move between windows and files without worrying about event attendees losing access to the sharing view.
- Sharing a specific window gives you the ability to choose what attendees will see. You can show them a specific file or browser window, for example. At the same time, they won’t have access to other parts, even if they accidentally appear on your screen.
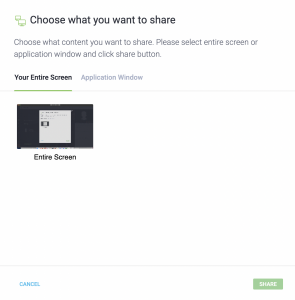
The option you select is entirely up to you. Each of them works well for slightly different situations. The ability to make a choice allows you to create even better and more personalized events.
How to add a presenter in the Desktop app
You can manage the whole event from the desktop app, including its participants. Directly in the event room, you can assign them specific roles, such as the function of a presenter.
To do that just select the appropriate person in the attendees’ window and then choose the Make presenter option.
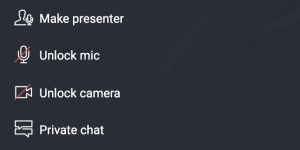
As you can see, there are definitely more options hidden here. So, you can, among other things, give your users the ability to use their camera or microphone, send them private chat messages, or log them out from your event.
The ClickMeeting Desktop App: a brief summary
The ClickMeeting Desktop App is another way to use the potential of our webinar and online meeting platform. Of course, you can freely choose which one is most convenient for you or use all of them at the same time.
The desktop application may be particularly interesting for people who often use the platform or do not want to conduct events via a browser. At the same time, it offers several additional features that may prove useful from the perspective of many users: the most important ones are the ability to apply a virtual background or blur it and to present the whole screen when sharing it.

 (4 votes, average: 4.00 out of 5)